Fenric has many plugins available for Carrara. I think that most are now available through the DAZ 3D store, now that he’s added a bundle product there containing many of those that were previously only available at his Fenric’s Fox Den Trading Post.
One such plugin called “Change Bone Visibility” is incredibly simple to use, but enormously helpful if you ever plan to animate any of the newer DAZ 3D figures, since the invention of Genesis and the Triax rigging system. When loading such figures into Carrara, the skeleton of the rig can become quite bothersome.
Using the tool is fast, and a major time and headache saver. The tool is only available at the Fox Den Trading Post at the time of this writing, and is only five US dollars!
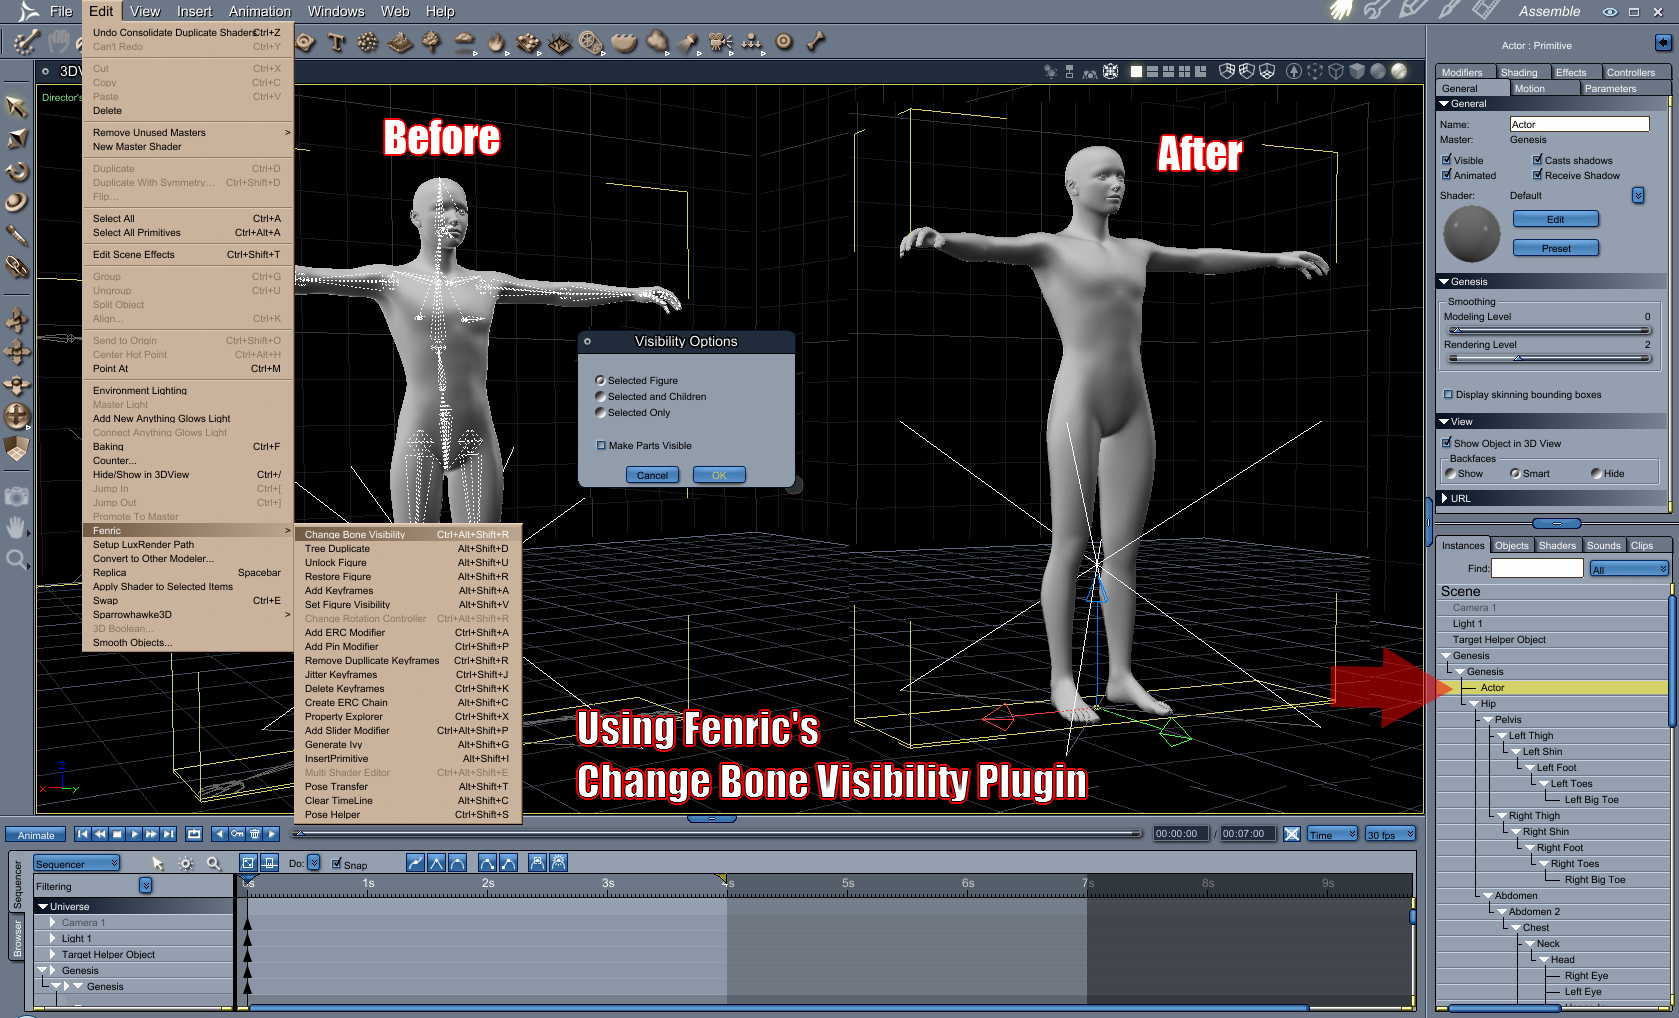
First of all, when we wish to ‘shape’ the figure, we need to have ‘Actor’ selected, which highlights these bones. The highlight often obscures our view of the figure’s face so much that it becomes a real burden to dial in specific details.
The other problematic area comes when right-click selecting to key-frame joint rotations by hand. Right-clicking directly on the bone in question removes that body part from the choice of selections in the right-click menu, as shown in the illustration below. We never want to actually select the Wireframe, which IS available in the list. We want the actual part.
Also as shown in the illustration is the same right-click menu from the same spot of right-clicking after using Fenric’s Change Bone Visibility tool:
EDIT > Fenric > Change Bone Visibility
Notice how the “Wireframe” option is no longer within the list? That’s exactly what we want! But also notice how clean and easy to work with our Genesis has now become, without the bones being visibile!
What is that you’re asking? “Can’t we just do this without buying a plugin?” The answer is “Yes, but not without its risk”.
To change bone visibility, you must select each bone in turn and, in the Effects tab, deselect “Display Wireframe When Attached”, a check box near the top of the panel. While this might sound simple, each time we perform this, it causes Carrara to to something that creates a lengthy pause, locking up Carrara until the wait is over… and this can occur for each bone, which makes for a lot of tedium.
I prefer to pose each finger joint for each major pose. You’ll often notice a lack of this operation in animations where the animator ignored doing so – which causes the hands to look unrealistically stiff. So I would need to perform this for each joint of each finger as well. I’ve even actually had Carrara crash before I’ve finished changing the bone visibility by hand like this.
I gave Fenric my five bucks at his Den, and downloaded the plugin.
Once installed, the entire procedure is instantaneous with no lag or pause from Carrara at all… so I now know that Carrara loves this tool as well!
Woods Creation has created a morphing area-mask tool that parents to the Carrara camera to block out all but a small window of your image. The tool is used to speed up re-rendering when only one small part of a render has changed – especially useful for very large renders and complex scenes with GI calculations. The masked render is then combined with your original full render in a layered photo editing tool like Photoshop. A professional studio time saver!
The fastest way to create DOF effect in your renders without to waste the long time that your application use to render, tutorial made using Poser Pro 2010, Carrara 8 Pro and Photoshop, skills level beginners
Skip to 5min30sec to see Mec4D’s amazing photoreal renders from Carrara 8.
“A demo of Sparrowhawke3D’s wonderful new plugin for Carrara called Instance Randomizer, which allows each instance of a duplicated object to have different shader values. Download here: http://www.sparrowhawke3d.com/Instanc…
This is a powerful new tool to use with Carrara so that each instance can be different colors – or any other attribute.”
Part 1 provides a quick overview of the PySwarm package – the PySwarm Interface App PIA, the PySwarm script, and the PySwarm wiki.
Part 2 covers how to set up your Carrara scene for importing a PySwarm script.
– Creating a default Carrara scene
– Setting BOID orientation
– Setting BOID Hot Point
– Naming BOIDs
– Duplicating BOIDs
– Numbering BOIDs
– Setting PySwarm parameters in PIA
– Importing and tweaking the parameters


 Saving...