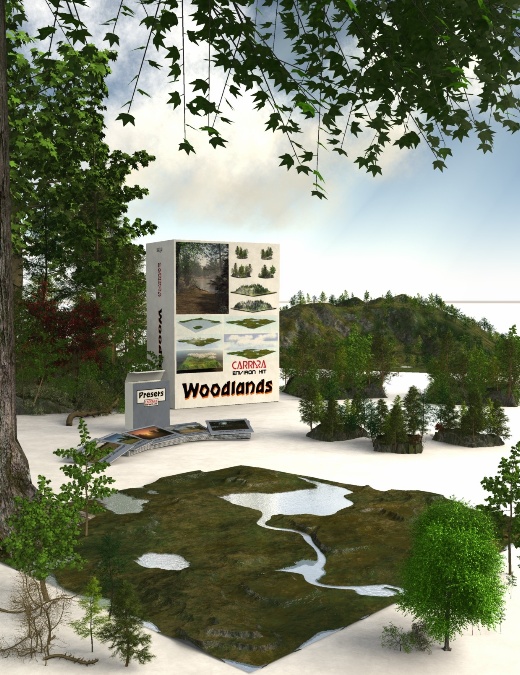
Woodlands is set up as a bunch of ready-to-use preset scenes as well as a complete outdoor scene construction kit. It includes 42 full scene presets which offer various options and styles to choose from, depending upon your needs.
What you get for $11.17, besides another 40% off Carrara 8 for a limited time:
42 Preset Carrara Scene Files (.CAR – Scenes Browser)
Preset Nature Blocks (.Car – Objects Browser)
New Preset Plants and Leaves(Berries) (.CAR – Objects Browser)
Three Complete Terrain Shaders
Two Water Shaders
Full Environmental Lighting Rigs in Every Preset
Additional Optional Clouds System
12 Texture Maps, Color, Highlight, and Bump
Selection of Distribution Maps for Use with Primary Terrain Replication
Bonus Animated Backdrop Scene With Motion Camera Setup for Figures Using a Walk Cycle – part of the educational part of the kit
The latest release of DIM (Daz Install Manager) 1.0.1.75 that was released on 20130617 now includes important updates for Carrara.The major feature is support for Carrara unique items and plugins, but also that Carrara 8.5 users now can skip to install Daz Studio but still get the full functionality of Genesis and metadata items.
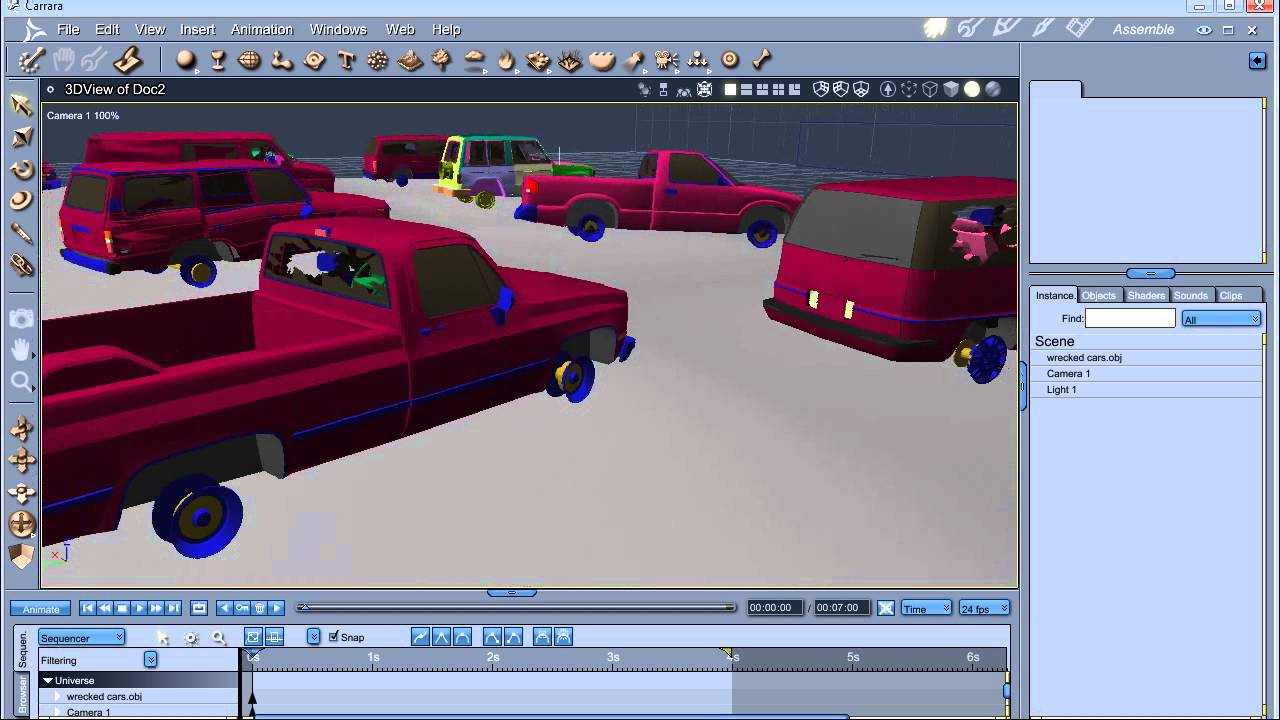
Sci Fi Funk has released a 4 part tutorial showing us how to apply rust shaders to a bunch of imported cars.
How to make rusty wrecked cars Tutorial. Using cheap models how to amend shading domains and apply rust shaders to your 3d models. I start the tutorial by looking for cheap (low poly) wrecked cars. The only ones I could find that were reasonable priced were (inevitably) in max format. So they need converting to something usable by Poser or Carrara. I briefly explain how to install 3ds max (for poser people). The only way I could export successfully was via obj format, but the shading domains are all over the place and I couldn’t get materials out. Even if I had they would need editing to rusted shaders. I explain how to model cars to make them look wrecked (move doors, bend plains etc).
PART 1 – http://www.youtube.com/watch?v=kyO53Smu6JE (Finding Car models and bringing into Carrara)
PART 2 – http://www.youtube.com/watch?v=8I9HT0-u1c4 (Organising your car models for shader work)
PART 3 – http://www.youtube.com/watch?v=KyoNAGYJKgE (Shader overview)
PART 4 – http://www.youtube.com/watch?v=rw7_jNxb4CU (Detailed explanations of the shaders)
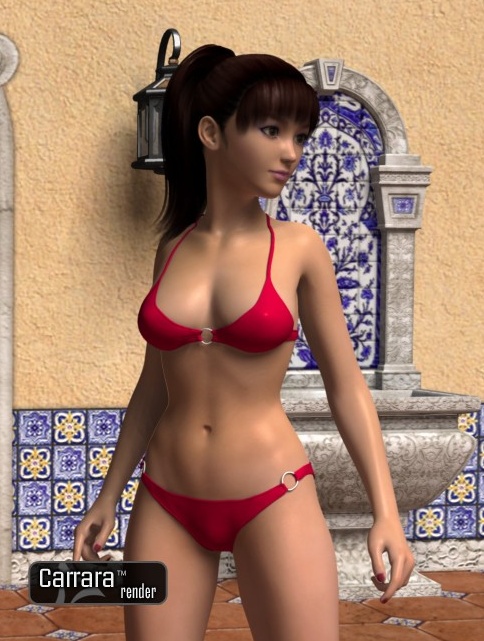
Ringo Monfort, the Carrara shader specialist has his entire store at 30% off, including his new releases:-DP – Carrara Shaders For Aiko 5
-Carrara Skin Shaders For David 5
-DP Carrara Master Collection Shaders
The Aiko 5 and David 5 shaders are the first Carrara shaders for the Genesis model and require the Carrara 8.5 beta.
The Carrara Master collection includes over 80 shaders and features: Anisotropic, sub-surface scattering, transparency absorption, fresnel, translucency and much more.
Full Suite for Carrara – includes Anything Goos, Anything Grooves, Anything Grows, Cognito, DCG Importer, Enhance:C, Ground Control, Noir, Parchment, Project Gemini, Shader Gel and Strobe, Shader Ops, Shader Ops 2, Shaders Plus, StarBright, Terrain Tools, Toon! Pro, Wireframe Pro All the DCG Carrara plug-ins at a super bundle price: $356.78 Power Pack for Carrara – includes Anything Grooves, Anything Grows, Shader Ops, StarBright Four classic plug-ins at a great price: $79.00 ShaderStyle for Carrara – includes Anything Goos, Shaders Plus, Toon! Pro, Wireframe Pro Step up your shading and rendering with the ShaderStyle bundle; cel shading, cartoon edges, dirt and aging, wireframes, bevel shading, GI shadow catching, and more: $99.00 Terrain Pack for Carrara – includes Ground Control, Terrain Tools If landscapes are your passion, the Ground Control and Terrain Tools bundle gets you two great plug-ins for one low price: $49.00
Thanks to booksbydavid for the tip.
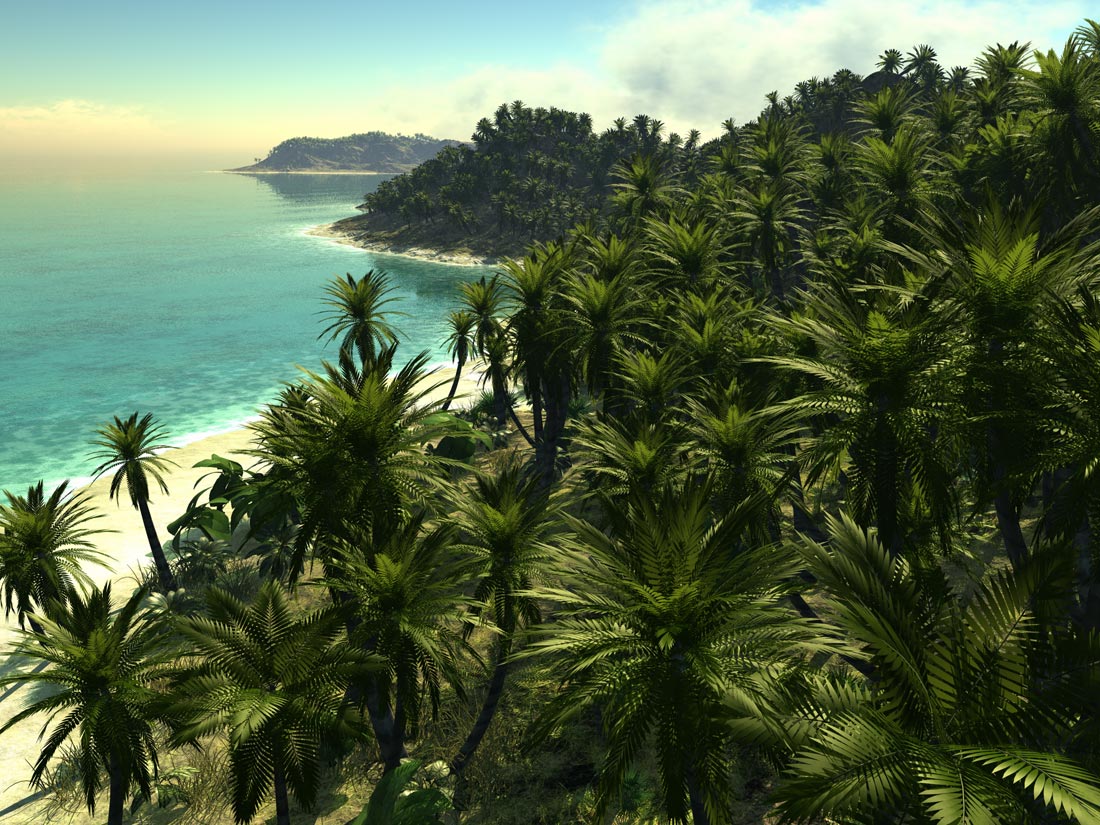
Patrick Tuten uses Shader Ops, Terrain Tools.
Landscape in Carrara 5 Pro. Surface replicator, translucency, caustics, volumetric clouds, GeoControl Beta. Shader Ops & Terrain Tools from DCG. All plants are made in Carrara.
Luxus the Luxrender plugin for Carrara, by Spheric Labs has just been released at the DAZ3D store with an introduction sale price of 20.99$, normal price will be 29.98$. Luxus supports Windows/Mac with 32/64bit versions for both.
Here is the list of what is included/supported:
The new Luxus the Luxrender plugin for Carrara is being developed by Spheric Labs at a very rapid rate. This blog is supposed to collect the most important information in one place.
The latest support additions are manual changes, free shaders and a FAQ, thanks to rk66, 3DAGE and Jay NOLA.
Luxus has been released and can now be bought from: http://www.daz3d.com/luxus-for-carrara
6. FAQ (Updated 2016-04-24):
Q1: How do I create an animation with Luxus?
A1: Luxus only saves one file per frame of the animation (does not launch Luxrender), then you need to manually open the files in the Queue page of Luxrender, which renders an image of each file in the same folder. Detailed steps:
1. First you MUST set ONE of these settings, otherwise the first frame will render forever: Render Room/Rendering/Film Options:
-Halttime: 60 (means 60 seconds of rendering per frame)
-Halt SPP: 100 (means 100 samples per pixel, maybe overkill for an animation)
2. Setup Carrara for animation rendering (Movie, frame rate… assume you know this)
3. Check “Choose path” in the Rendering page in Carrara/Render room/Render/Rendering/LuxRender, to make sure that you know where the *.lxs files get saved.
4. Press Render. Done. Super quick since only files are saved, no rendering job has been done.
5. Load Luxrender and go to the Queue page and press “+” to load all the *.lxs files.
6. Watch Luxrender do its thing, all images should be saved in the same folder.
7. Enjoy!


 Saving...