Sparrowhawke3D Cloth Tutorials
This tutorial covers the basic function of the Sparrowhawke3D Cloth Deformer plugin for Carrara.
This tutorial shows how to use my Cloth Deformer to drape a bed sheet over a figure in Carrara.
This tutorial covers the basic function of the Sparrowhawke3D Cloth Deformer plugin for Carrara.
This tutorial shows how to use my Cloth Deformer to drape a bed sheet over a figure in Carrara.
Tweeners are the motion between two keyframes of animation. Here I discuss a range of tweeners.
Without tweeners your animation would be horribly stop-start. The most basic tweener is to make no alteration to the time and distance or route that the object takes between two animation keyframes.
In this case the object with start, move and stop at a constant rate. In the real world there is inertia to take into account (the effort to start up, the slow down before a stop).
Some of these tweeners change the path as well from a constant to formula driven (for example moving in an arc).
I also talk about the parameters for each tweener.
The full list of tweeners I cover in this video are
– Linear.
– Bezier.
– Discrete.
– Formula.
– Oscilate.
– Noise Tweener.
– Spline.
– Velocity.
Eric Winemiller of Digital Carver’s Guild shares a quick video showing how to install a Carrara plug-in under Mac OS X.
How to use Mimic Pro for Carrara effectively, looks at this lip sync software and some of the theory behind mouth movements. more info at http://www.facebook.com/scififunk
Non linear animation within Carrara allows you to organize your animation clips or poses into blocks for convenient re-use and alterations within your 3d scene.
One the animation is in an NLA block it can be sped up or slowed down by just dragging the start/end points. It can be looped, reversed, and duplicated – so that ghost copies exist. i.e. Edit one and all change.
NLA “clips” as they are called can also be copied and pasted (as unique clips), for further distinct editing.
The pose clips (a still position) can also be used to animate with as the NLA sequencer will tween between the two poses, thus forming an animation. Couple this with a sound knowledge of the tweeners in Carrara and you have a pretty flexible animation system.
Using NLA Animation for facial expressions in Carrara. Tutorial explains how to work with Non-linear animation clips for facial expressions. more at http://www.facebook.com/scififunk
Non linear animation within Carrara allows you to organize your animation clips or poses into blocks for convenient re-use and alterations within your 3d scene.
One the animation is in an NLA block it can be sped up or slowed down by just dragging the start/end points. It can be looped, reversed, and duplicated – so that ghost copies exist. i.e. Edit one and all change.
NLA “clips” as they are called can also be copied and pasted (as unique clips), for further distinct editing.
In this video I look at using ADSR theory (or envelope theory) from synthesizer programming and apply it to the world of 3d animation. The principle works! It allows you to start up, hold and close a facial expression WITHOUT the risk of leaving that expression “on” when not required later in the animation.
I also talk about ADSR envelopes and help the viewer visualize how an envelope can help you in your animation.
[bws_related_posts]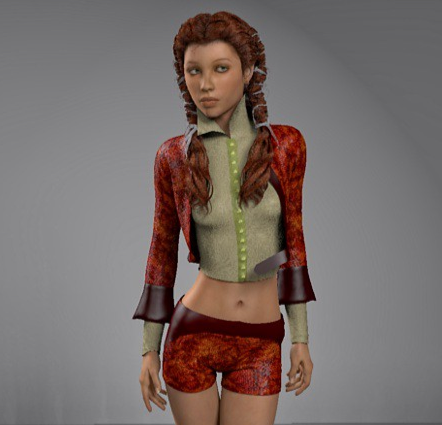
Marvelous Designer is a clothing design program that allows you to create and drape simple as well as very complex dynamic clothing. It translates 2D patterns into 3D cloth ready to fit any imported avatar. It takes a bit of time to learn how Marvelous Designer does things, but after you’ve passed that hurdle dynamic clothing creation is simple.
While Carrara doesn’t have built in dynamic cloth functions, dynamic clothing can be used to good effect in Carrara via Marvelous Designer. This short walk through is how I get dynamic clothing from Marvelous Designer to Carrara.
For this walk through, I’m using Carrara 8.1 Pro and Marvelous Designer 2. There are newer versions of both programs, but the upgrade cost for both programs is out of my reach. As far as I can tell, however, this walk through should work for the newer versions of each program as well.
First, in Carrara load the figure you plan to dress. I’m using Victoria 4 for this example. It is also a good idea to load whatever morphs you will need and morph the character now before you move it into Marvelous Designer. This saves time and aggravation later.
Once you’ve got the figure you want, you will need to export your figure as a .obj file. Marvelous Designer will import Collada as well, but I have not had good results going that route. To export the figure in Carrara, choose File/Export. A dialogue box will appear.
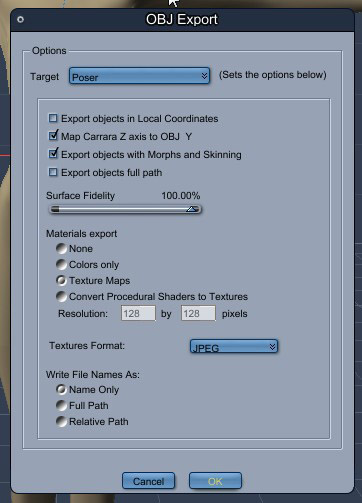
You will have several different Target choices. It doesn’t really matter which one you choose as Marvelous Designer will automatically scale the model when it’s imported. If you choose the default target make sure you check Export objects with Morphs and Skinning, so your figure will import with its morphs intact. To avoid confusion, I always choose the Poser target.
Next, pose your figure as you will want it in your final render and export this figure using the same process as above. Save your posed character in Carrara, so you can use it later.
After the figure is exported, you will then import the figure into Marvelous Designer. When Marvelous Designer opens, you will see the default avatar already loaded. You need to delete this avatar and her dress. To delete the avatar, chose Avatar/Clear. Then go to File/New to clear the scene.
![]()
Next, you will import your figure. Go to File/Import/Obj and locate your figure. A dialogue box will appear.
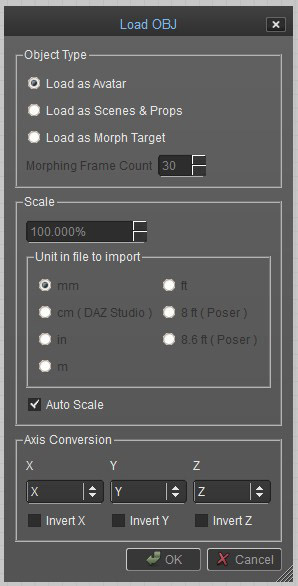
You will need to make sure ‘Load as Avatar’ is ticked and ‘Auto Scale’ is checked. Then hit ‘OK’. Your figure will load into Marvelous Designer properly scaled and with morphs intact.
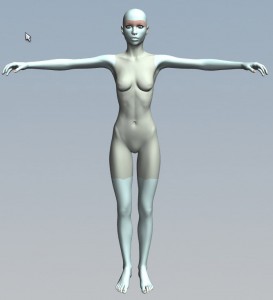
You can now proceed to create your clothing pattern. Here is an outfit I created for V4.
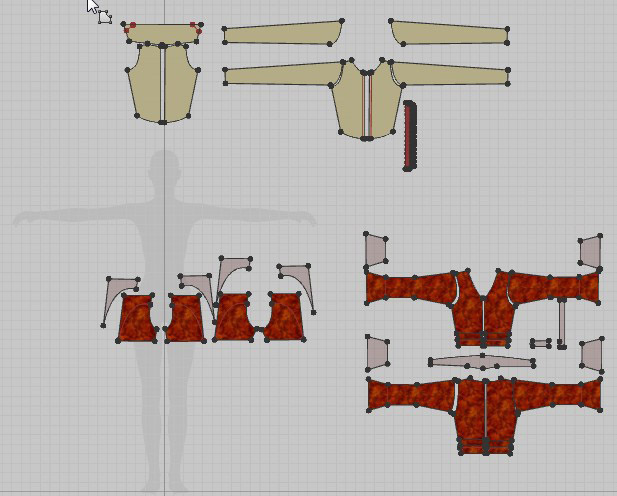
Once you have created your clothing, you will need to fit the clothing to the figure.
Now, we want to fit the clothing to our posed avatar. Choose File/Import/Obj again. This time select the .obj of the posed figure you created at the beginning. A dialogue box will appear.
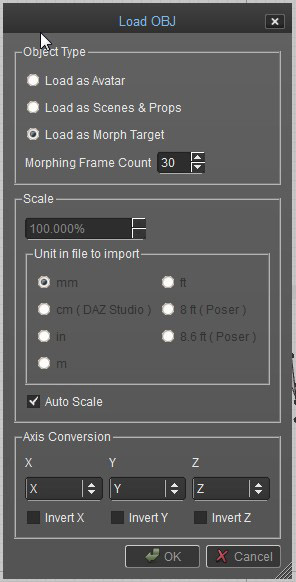
This time you will tick ‘Load as Morph Target’ and check ‘Auto Scale’. Marvelous Designer will run a simulation using the posed .obj as its target. When the simulation is complete, the clothing will be fitted on the posed model.
After the clothing is fitted to the figure, you can export it to Carrara. In Marvelous Designer choose File/Export/Obj. A dialogue box will appear giving you the export options. You will need to check boxes for Cloth_Shape, Welding and Remove Collapsed Triangles. Unless you want a .obj copy of your original figure, make sure that the box for Obj_Avatar_Shape is unchecked.
I do not check Unified UV Coordinates. I normally add textures in Marvelous Designer. I scale and adjust the textures using Marvelous Designers texture tools. Unifying the UVs will erase all of that on export and make all the textures the same scale. I’ve not noticed any real benefit to unifying the UVs since I’m able to work with textures in Carrara either way, so it all depends on where and how you add textures to your garment.
The last to do is make sure that ‘8ft. Poser’ scale is ticked. This will make sure that the clothing object will be exported in the correct scale.
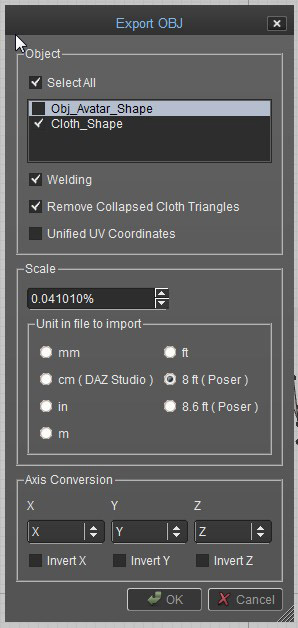
The next step is importing the new clothing object into Carrara. In Carrara choose File/Import. You will get a dialogue box.
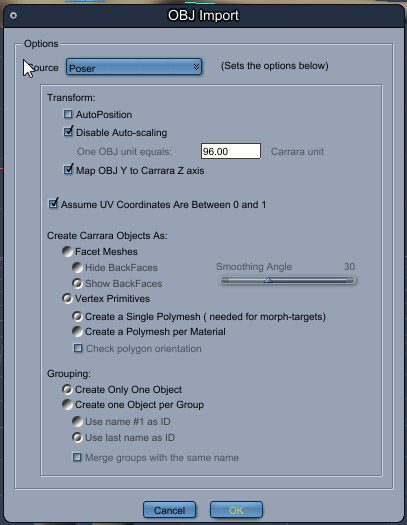
This time make sure you choose ‘Poser’ as your source. Any other option will load the clothing object in the wrong scale. Click ‘OK’. Your garment should load in the correct scale in the pose you exported it with.
Here is the final image of my Carrara/Marvelous Designer creation. It’s missing some details that can be added in Carrara or Marvelous Designer or in post but in general it looks pretty good.
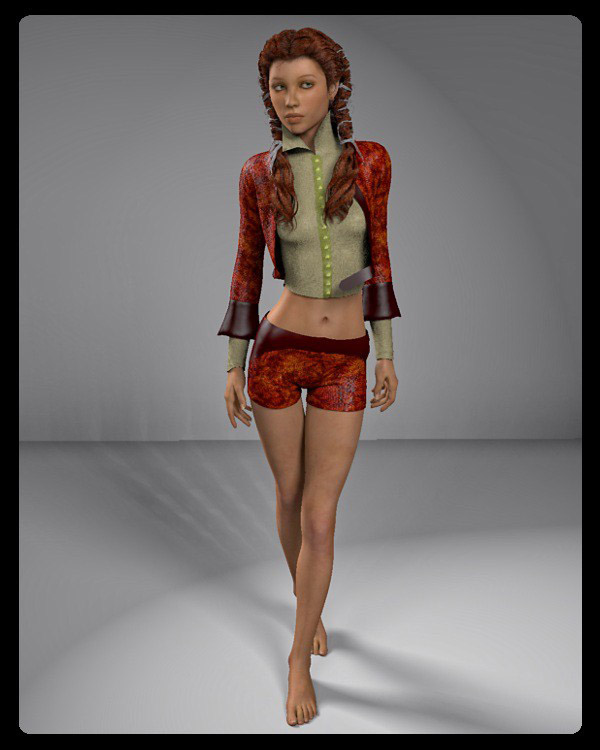
©2014 David Collins/booksbydavid
Marvelous Designer
http://www.marvelousdesigner.com
MDD File Format for Carrara import/export plugin needed for MD’s animation add-on
http://www.daz3d.com/mdd-file-format-for-carrara
Fenric’s OBJ Sequence Exporter plugin alternative to MDD file format
http://fenric.com/wordpress/store/products/object-sequence-exporter/
DCG Importer Digital Carver’s Guild OBJ Sequence import plugin alternative to MDD file format
http://www.digitalcarversguild.com/plugin.php?ProductId=21
Woods Creation has published three tutorials on exporting Carrara models and scenes to Blender, with the help of mCasual’s Blender Python script “mcjBlendBotSpecial”.
Here is the first tutorial in the series.
All three video tutorials are posted on Woods Creation’s website
Download the Python Blender script mcjblendbotspecial from mCasual.
How to actually render with Carrara and multiple machines without pulling your hair out in frustration.
More at http://www.facebook.com/scififunk