OctaneRender™ 4.0 for Carrara® released

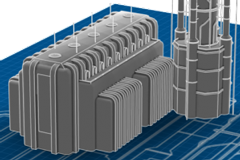
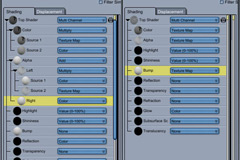
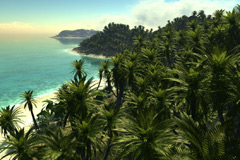
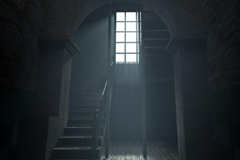
OTOY has released OctaneRender 4.0 after a long beta period. The update is free for existing customers and new customers pay the same as usual or can try the new rental license instead. The Carrara plug-in was updated along with all other plugins, 14 in total and there is also a purchase option that includes multiple plug-ins.
The list of updates is very long, so head over to OTOY to check out all the new features.

OR 4.0 features: https://home.otoy.com/octanerender-4/

Carrara plugin forum: https://render.otoy.com/forum/viewforum.php?f=79


Genesis Morphs Eraser – New Carrara plug-in by AB

Genesis Morphs Eraser – New Carrara plug-in by AB

Genesis Morphs Eraser Carrara plug-in by AB

AB: “Genesis Morphs Eraser is a tool for reducing the Genesis files size in Carrara 8.5 by deleting unused morphs. 

It’s released for Windows 64 and 32 bits and MacOS 64 bits.”

Infos > https://www.daz3d.com/forums/discussion/298236/genesis-morphs-eraser-plugin

More info you can find here: https://www.daz3d.com/forums/discussion/173071/how-to-reduce-genesis-file-sizes-in-carrara

Direct link to plug-in at ShareCG:
https://sharecg.com/v/92883/view/9/Plug-in/Genesis-Morphs-Eraser

New plugin: Phong tessellation and displacement

New plugin: Phong tessellation and displacement

Philemo: “I would like to thank @Magaremoto for the starting point of this idea. He suggested to look into Renderman to pick good ideas.

I discovered that Renderman subdivides meshes so that each facet fits in a Pixel. The first idea I had reading this was that would be great for displacement.

That done, I needed a subdivision (or tessellation) method that respected the existing render and was fast enough. Carrara using Phong shading, I decided to use Phong tessellation. This algorithm, created by Tamy Boubekeur and Marc Alexa (see https://perso.telecom-paristech.fr/boubek/papers/PhongTessellation/). This method is widely used in games to give nice contours to low poly models. As the author says, “Our technique is a geometric version of Phong normal interpolation, not applied on normals but on the vertex positions. We call this strategy Phong Tessellation. “.”


Carrara and displacement

Carrara usually does a fine job to simulate displacement with bump mapping when the surface is facing the camera and the light. This is not so good when the camera and/or the light are grazing the surface. Also, contours do not reflect the impression given by facing facets.

Carrara has displacement. It works great on geometric primitives (like sphere, plane,..). For meshes, it’s a little more … touchy. Displacing the vertices at the facet size is usually not enough. So, there is subdivision. The problem here is that the complete mesh is subdivided, regardless of it actually on the screen and visible from the camera. Heavy subdivision usually takes a lot of time.

Micro-dispalcement

The idea of this Plug-in is to subdivide heavily (up to 4 vertices per pixel), but only what is necessary. So, off-screen facets or facing away from the camera are not subdivided. Contours are perfect due to subdivision and micro displacement is now possible.

Micro displacement is using displacement in place of bump mapping. It allows to have consistency in quality between facing and grazing angles, both from the Camera and the lights, as it uses real geometry and is not trying to simulate it.

As Carrara is already very good at simulating displacement by bump mapping, for realistic values of displacement, the improvement is very subtle and should be considered before using.

For instance, for a grazing angle (upper jaw), the first image is rendered using bump mapping and the second one using micro displacement. There are differences, although you may have to look for them and I think the overall quality is better.

On this example on a facing fragment, (the forehead), the difference is not obvious at all:

Macro Displacement

Macro displacement is used to simulate geometry at run time. It usually has both displacement (or height) map and bump/normal map.

This is where the plugin takes its full power:

Usage of the plugin

Phong tessellation is a modifier that applies to meshes.

Select the modifier from the list:

There are 3 parameters in this plugin:

  •  Enabled: Activate the plugin. Otherwise do nothing. Use it to re-generate the tessellation is camera, object or displacement has changed.
  • Shape factor: Strength of the Phong effect. 0 will give you flat shading, 0,5 is normal, 1 is overdone (stuffed fabric effect).
  • Vertex per half pixel: number of vertices generated by half screen pixel horizontally and vertically. 1 is 4 vertices per pixel, 2 is 1 per pixel, 4 is 2 per square of 2×2 pixels and so on. Use value 1 for micro displacement or macro displacement with sharp contrast, 2 or less is the displacement map is blurred. Starting from value 1, each successive value divides the number of vertices generated by value squared (2 is 4 times less, 3 is 9 times, 4 16 times and so on).


Displacement

To set displacement, use the standard displacement shader in the shader room.Before doing so, untick if necessary the “enabled” value in the modifier (otherwise it may take a very longtime).

First make sure the “enable displacement” is disabled.
Then set amplitude and offset and displacement shader as usual.

Performances

On my 5 years old laptop, tessellation generates about 1 million facets per second. Displacement is about 3 times faster.

Afterwards, Carrara needs at least as much time to digest all those facets.

Rendering is usually 2,5 times slower at maximum precision.

Download

Windows version is available at Sourceforge.

OSX version coming soon.

DCG plugins going open source

DCG plugins going open source

Eric Winemiller (DCG):

“Hi folks,

It’s been a long time, but I have some fun news.

I will be releasing all the DCG plug-ins I have rights to as open source. I am still working through the open source license and hosting decision, but as a first step, there is a beta for the no purchase or serial number required version of the plug-ins.”

More infos

here > https://www.daz3d.com/forums/discussion/266831/digital-carvers-guild-going-open-source

and here (with downloads) > http://www.digitalcarversguild.com/


Carrara River Dells Freebie

Carrara River Dells Freebie

An awesome freebie that could have been a 30$ store item by evilproducder.
From the DAZ3D forum: https://www.daz3d.com/forums/discussion/262431/carrara-river-dells-freebie

Hi all, I originally started this scene with the idea of making something saleable. As I progressed with it, I knew I had a lot to learn and that there were some issues with it that would make it easier almost to start from scratch. I still think this is a really cool scene, with some neat ideas, and hate for it to sit on my hard drive for only me to use. As such, I am making it available as a free scene for anyone to use.

The scene is my artistic representation of the Wisconsin Dells area of the Wisconsin River. This is not a specific stretch of the river or specific rock outcrops or islands. It is just supposed to be suggestive of the unique geography of the area. The size is approximately 500′ x 500′.

The islands are not attached to the terrain and can be moved, removed, duplicated, etc. as you wish. The islands have their own replicators for trees and plants, as well as the cliffs. The scene makes heavy use of replicators and they are set up in a somewhat modular way, in that if an area of the scene is not in view, there is a good chance you can hide a replicator or two to speed up your render time without effecting what the camera is seeing. In the midday scene I tried an experiment with putting a large sphere around the scene and wrapping a spherical render around it to give the illusion of a larger world. This is nothing new, except the experimental part for me, was rendering it with an alpha where the sky would be, so that you can still use a realistic atmosphere, clouds, etc. without being hemmed in by the sphere. Unfortunately there is some fringing where the alpha meets the tree line. Still, unless you are aiming the camera out at the sphere directly it does a fairly nice job extending the scene. Feel free to delete it if you don’t like it.

I have a couple different fern plants. They are both vertex objects. One is higher res fern with a painted texture using Carrara’s 3D paint brush. The other is a lower res fern with a procedural shader. They are located in the River Dells plant folder (which can be added to your Object Browser). If you are doing a scene with ferns close to the camera, I would recommend adding the hi-res fern to the needed replicator and deleting the default lower res fern. Check first, because I may have experimented with the higher res ferns in some of the replicators and forgot to switch back to the lower res fern.

Anyway, here is the link. If you have any questions, please ask! Also, I would love any comments you have about the scene, as well as constructive criticism so that I may inprove my terrain and environments in the future.
The file is in my Dropbox. There is no membership requirement to download. I was aslo going to put it up on ShareCG, but the uploader chokes on me. The file is around 107 MB zipped.
https://www.dropbox.com/s/1q869tm9v28yvd3/River-Dells.zip?dl=0

New Carrara Plug-in – Cutouts and Blimps

New Carrara Plug-in – Cutouts and Blimps

Cutouts and Blimps by Philemo

Philemo“A cutout is a plane on which an image is mapped and the transparent parts removed. Why would you say ? Just because because the renderer doesn’t like transparency. So trading polygons for transparency is usually a good bargain. For instance, a tree where leaves have no transparency renders 10 times faster than a tree where leaves are a rectangle with transparency.

A blimp is an inflated cutout, similar to the “organic” operator in the vertex room. It’s useful when you want to use cutouts to populate background (a common practice) and you want a better response to light. You can see the difference in this post I made in back in February.

You can also use it as a starting point for modeling from a drawing, given that UV mapping will be Box front and back. You can also use it for titling with round, cartoon like fonts.”


More Infos here > https://www.daz3d.com/forums/discussion/259016/new-plugin-cutouts-and-blimps

Download here > https://sourceforge.net/projects/carrara-time-savers/files/


New Carrara plug-in: PBRLightingModel UPDATED 180612

New Carrara plug-in: PBRLightingModel UPDATED 180612

UPDATED 2018-06-12 New versions for Windows and OSX online now.
Now supports DAZ Studio shaders importing, see the following video for more info:


UPDATED 20180409
Philemo is hard at work with the third beta version of the PBR plugin for Carrara:
“Starting to experiment how to convert Studio shaders to PBR…”

UPDATED 20180408
A new beta is available. It adds the metallic workflow and an importer. New version is available here
More info here in the DAZ3D forums.
Updated PDF manual: PBRmanual02

Original article 20180328
Philemo has just released an early beta version of a new plugin for Carrara, PBR Lighting Model.

“I’ve started a new plugin that allows import “as-is” of PBR textures (albedo, roughness/glossiness, Ambient occlusion and metallic) such as the ones produced by Substance.
So far, it’s done for non-metallic materials (dielectric in PBR jargon).
To do that, I have implemented the Disney Principle BSDR as a lighting model. I’ve choosen it because it (or a modified version of it) is widely implemented (Blender/cycle, Appleseed, Renderman and many other included countless game engines). So, it was just time Carrara got itsown version :-). You can see here the Renderman documentation on this model (it’s the best one I’ve found so far). On top of PBR, Disney Principle add (a not convincing) subsurface, anisotropy, sheen for cloth, glossy clearcoat.”

More info in the post at the DAZ3D forum:
https://www.daz3d.com/forums/discussion/240836/beta-available-pbr-microfacets-disney-fresnel-and-tutti-quanti/p1

The updated manual is available as a PDF is here (Does not include info about the latest version DS import yet): PBRmanual02

Release note 20180328:
Beta version is out here (Windows 64 only, sorry for Mac user, I’ll try to provide an OSX version later this week).
You can find a basic documentation in this post
This is only the specular workflow. Metallic map are ignored for now. Next version will have it.

Release note 20180408
A new beta is available. It adds the metallic workflow and an importer. New version is available here.
More info here in the DAZ3D forums.

Release note 20180612
The idea behind this new feature is to exploit as much data as possible from Studio material, including Iray or other shaders type. The result may be better, equivalent or worst, depending on the quality of the material itself, the lighting in the scene and lighting model used is Studio. In the other hand, as all data will be in the shader (specular map, reflection map, normal map…), it will be easier to tweak if need be.
the DUF file is to be applied to the imported par containing vertex data (usually the “model part”).
In the effect tab of primitives, the is a new widget allowing drag & drop of DUF files. All shaders included in the Duf file will be imported, even if not used on this particular model (it’s particularly true for scene Preset shading many primitives). It’s still in Beta Stage. Please be sure to report any issue.

Example Carrara render from the new version with metallic support, using an HDRI background: