 Carrara has a vast array of little check boxes and fields to fill in that help us to have things animate on their own with just a little input from us. All over the place the Carrara interface is checking to see if we need some automatic animation assistance, and I think that’s very cool, indeed! In this article I wanted to instead demonstrate my simple method of character animation. There are many techniques to animating characters and I’ve read instructions about quite a few of them from text books to online tutorials and even a few videos on the subject. The method I ended up becoming the most comfortable with is most similar to the text book, but likely has a bit of other sources mixed in as well. All in all, I don’t really think that it’s the studying that makes us better at animation, but the practice. Not to belittle education mind you. Not even close. It’s the study that gives us knowledge and inspiration – a good idea of where to begin with great advice on how we need to interact in between and performing counter balance motions, weight distributions. But nothing can actually make that stuff happen for you. In order to make it happen, you actually need to advance that timeline and make a move! So let’s get started.
Most of you probably already know that I’ll be using a DAZ 3D figure for this demonstration, right? That’s just who I am – the All DAZ 3D Kid, ever vigilant in the use of DAZ 3D content! What can I say, I like what they offer, and the stuff I collect just always seems to work. And why wreck a good thing, right? Okay, but I’d like to quickly point out that these techniques will work with other figures as well. I’m not using anything specific that is unique to a DAZ 3D model.
For starters, although I’m going to end up with 30 frames per second, to simplify my workflow for now I’m going to use 6 fps instead. This makes it a lot easier to grab specific parts of the second during the initial animation creation phase, and we can change this any time we feel that we must. Suffice to say that it also allows me to see an entire four seconds at once in the storyboard room at this rate.
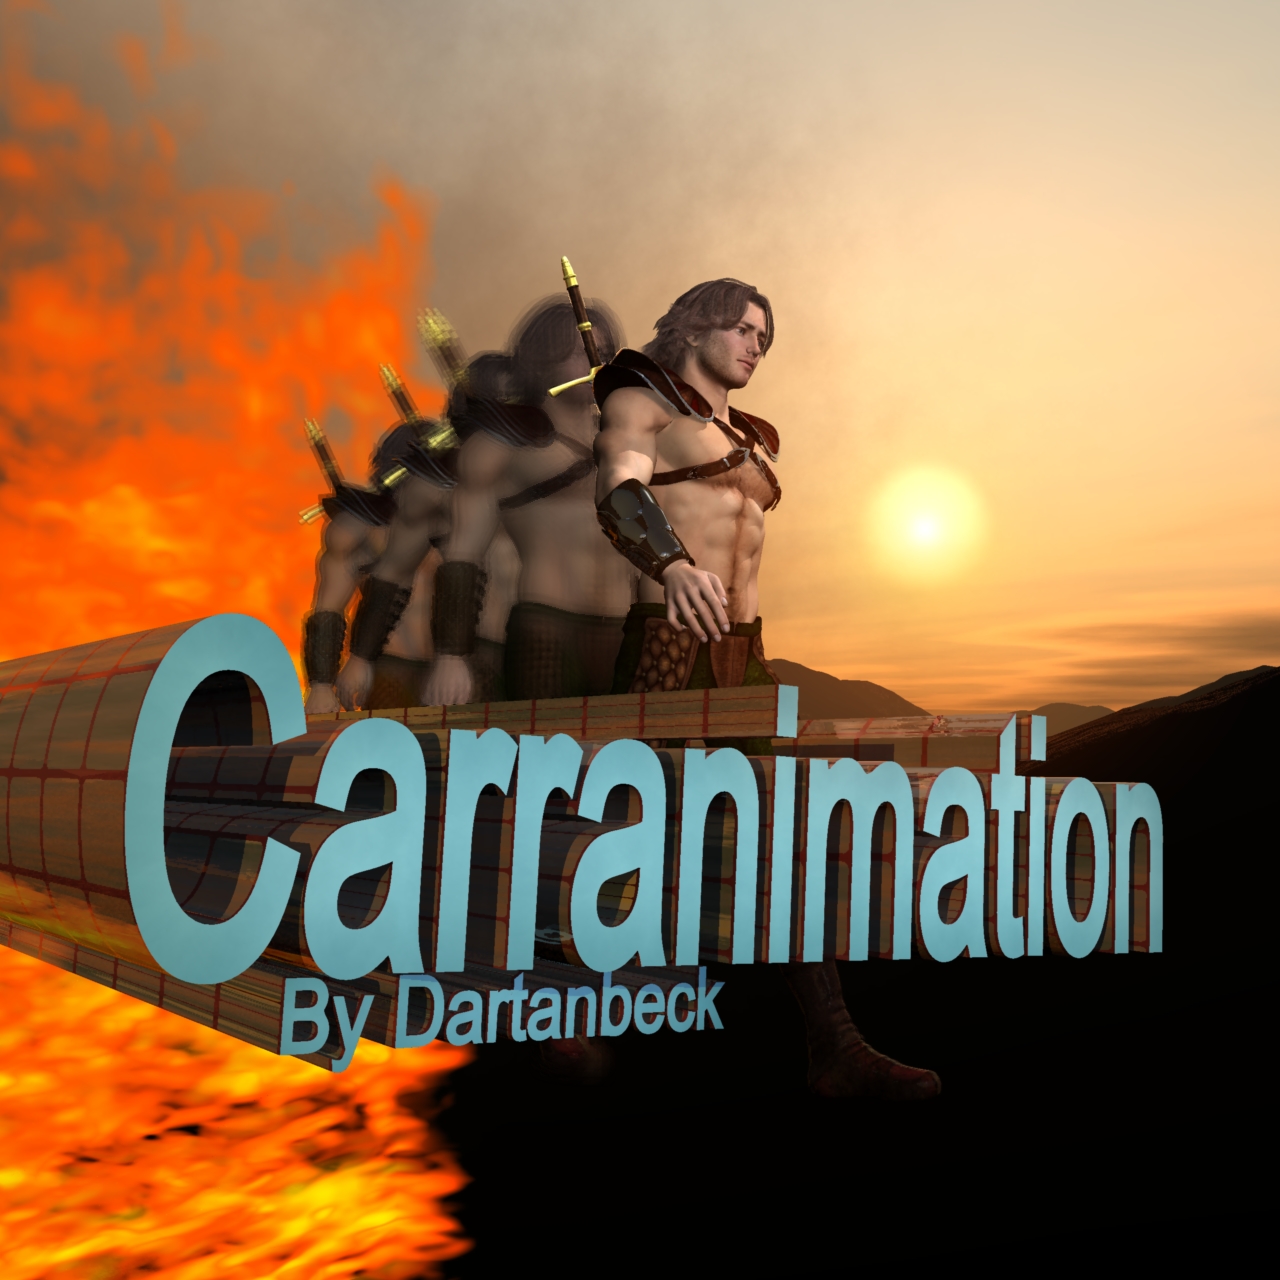
With that set up and my figure loaded in, I like to get a couple of cameras into the scene at different angles, light enough to see a render here and there, and then go about shaping the final pose that I want the animation to end on, in the final frame. My hero characters load in with their arms already by their sides and are in a somewhat natural neutral position for who they are. So Rosie’s default pose differs from Dartan’s default. Just a habit I’ve formed once I started making animations with these folks. As a matter of fact, I like to save any form of animation assistance that I happen to create along the way that might (even if it only might) save me some time or headache later on down the road. 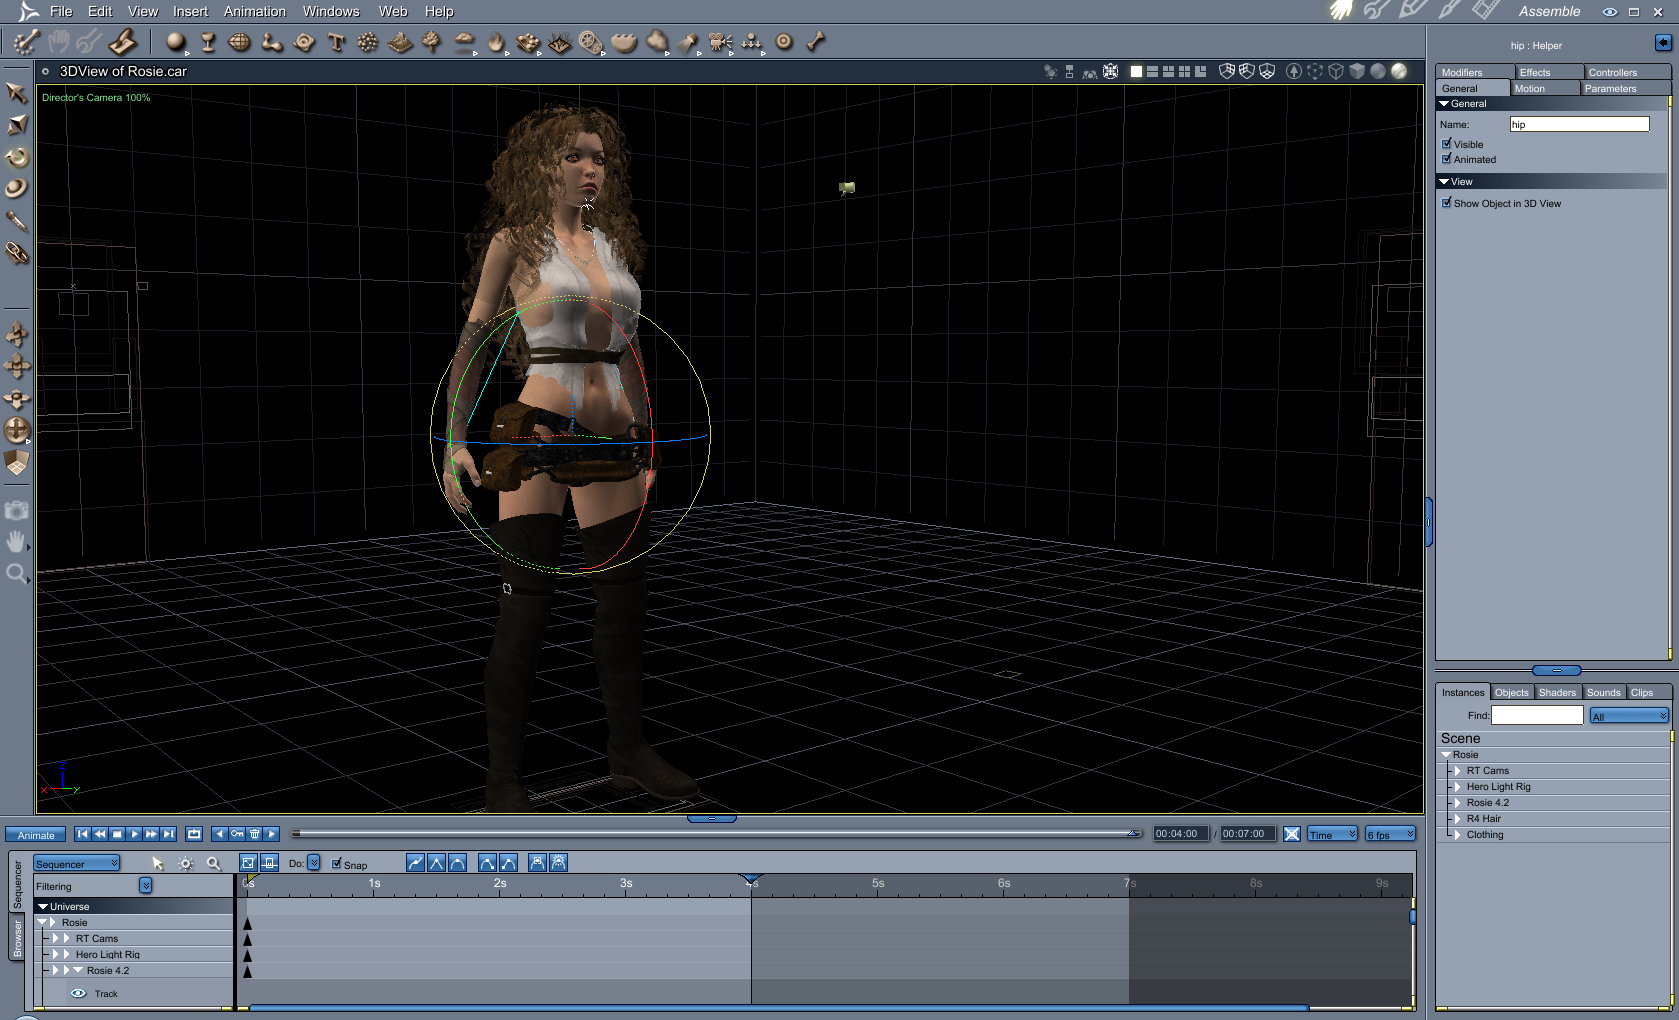
How do we determine the pose? To me, it’s always what happens in between that gets me to animating in the first place. So I try to imaging just a few, short seconds of what exactly needs to happen. so that final pose isn’t always a stopping point for the character, but it does hold a key to how the whole animation is going to flow. For example, is the character moving forward or backward at all? If so, I immediately grab the hip and move it forward or back according to where it should be after the action occurs. Then I set the rotation of the hip. Personally, I don’t rotate one axis at a time, I use the rotate tool (r) and grab a piece of space in between the axis arcs so that I can rotate freely among any of them at will. Of course this will lead to time when a single axis adjustment is needed, but I almost always begin with a fairly major change in hip rotation on all axis with at least some translation forward, backward, left, or right. It’s the hip that sets the actual major of the figure – so this is obviously the most important thing to nail down right from the start. It sure looks goofy though, doesn’t it? A still, straight pose all rotated around awkwardly – silly! So in my image I show the first hip translation and rotation, but next to it I illustrate what the final pose ended up looking like. 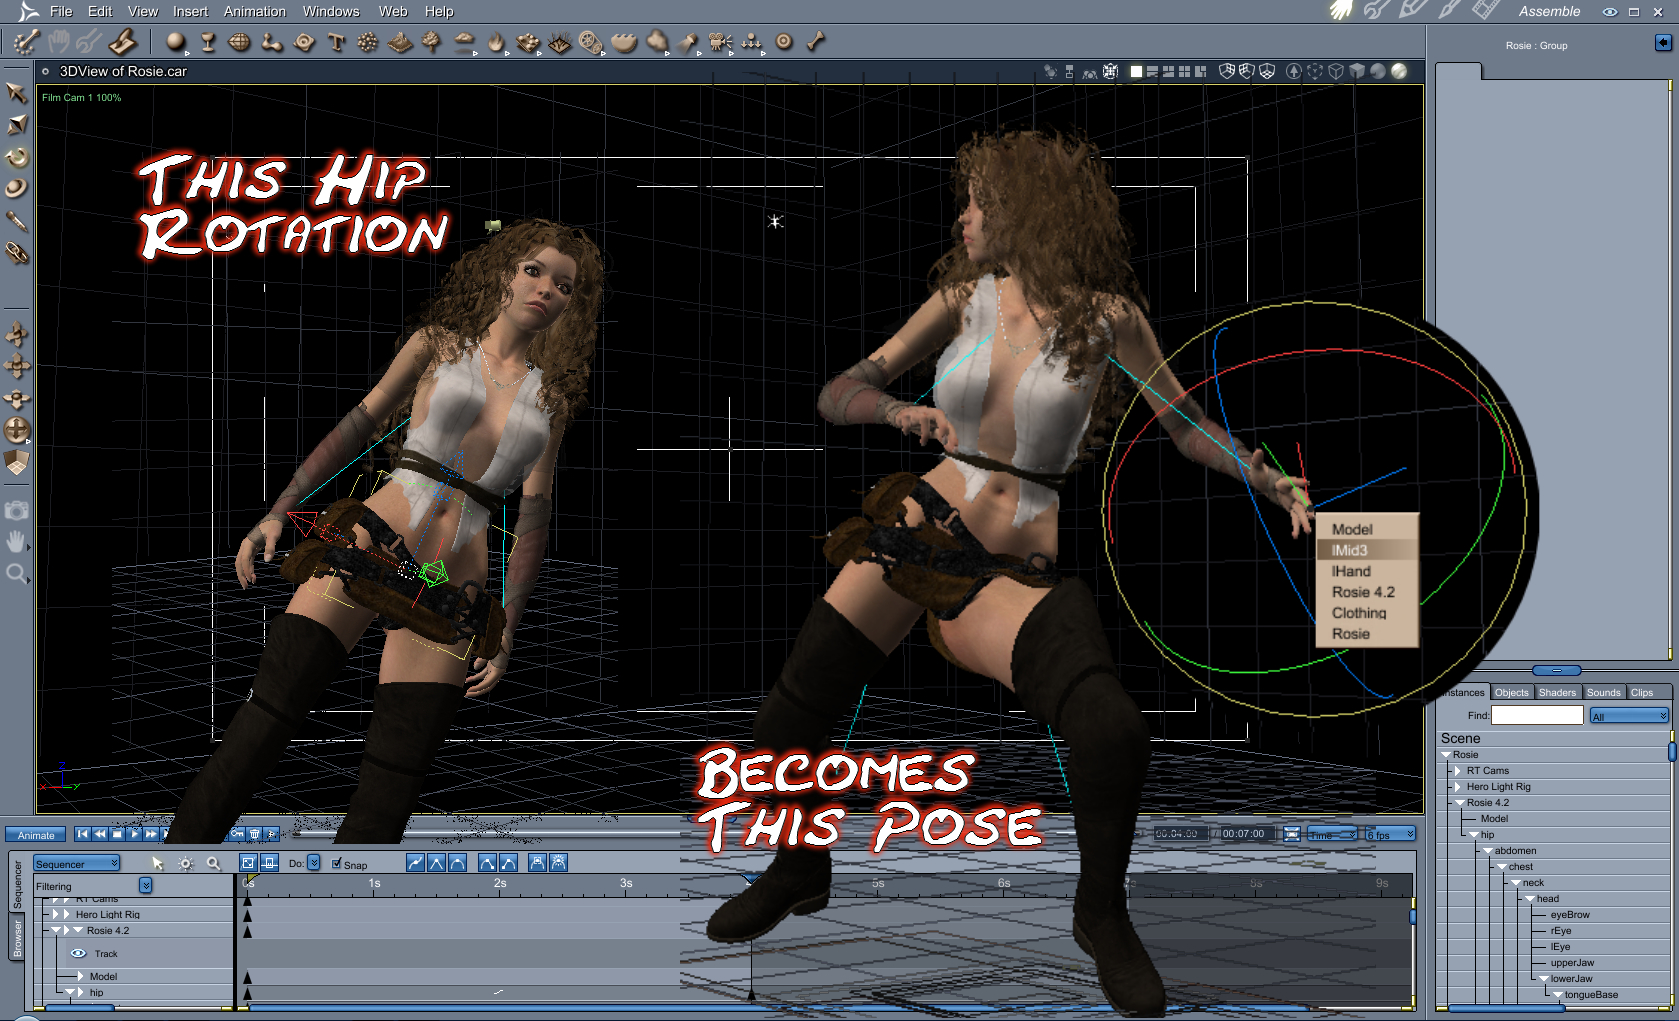
Shape the pose, and be creative with it. Here is your chance to direct exactly what that hero or villain is up to. You could use purchased poses for any of this, but for the sake of this article, we’re going to do everything by hand. For the sake of this tutorial, I am just winging it with whatever action might come to mind at the time. But when you really get a vision of the outcome of an animation in your mind, remember to think about what all has to happen between just before your animation begins and where it goes afterwards. Give yourself a scope within those two places and focus on it. The first thing to imagine is the action itself. Is he swinging a sword or is she fleeing from a dragon? Within that time frame, no mater how subtle, the hip is going to need to change rotation, even if it’s general position in x, y, and z remains fairly close. This will make your animation look much more realistic, right from the start – or rather, animations without hip rotations look less believable, to be more accurate – even if the viewer doesn’t actually mark that as the problem, it will automatically stiffen the whole thing, which throws off the flow of how we perceive things. And animation is all about perception.
All of this talk and we’re still talking about the creation of the first pose – what? This is good, because patience and foresight will truly help in our animation! So now I have made at least a rough draft of one possible outcome. At this point I already have the understanding that this pose is actually a placeholder and could change or end up omitted entirely by the time I’m done. But according to my vision of where I should be right here, I have some important work completed for joint rotation, and motion. More importantly the hip has been rotated in all three axis. This forces a keyframe to be made for each of them, so I won’t have any unexpected anomalies coming from those, most important parts of a figure’s animation. Although I haven’t really made the actual ordeal of what this animation’s purpose is, I look at what I have as an animation so far – a smooth transition from the default pose (or whatever I might have started with at frame 0) to the one I just made. Directly in the middle here is where I want to make the pose that really drives the climax of the action. I will likely be moving all of these keyframes around along the timeline, more on that later, and this is a perfectly clean place to put changes. I prefer to save working in cramped situations for only when absolutely necessary. Now that I’m creating a pose at two seconds to compliment the pose at the end, I’ll set the scene begin time where I’m making this pose, so I can quickly jump between this time frame and the end. I already know what the first pose is, which will change when I’m done with this one.
Since I’m just making this motion up as I type, I’ll make this middle climax pose a landing from a jump or a fall, so she can slide into where I’ve just posed her for the end. This time I have a place of consideration to help me in placing the position of the hip. The placement generated by our tweener. This gives us an opportunity to have the beginning faster or slower in motion than the ending, and then we can always reposition the action anywhere we want along the timeline if we change our mind. For this I’m keeping the speed of motion constant, but I’m lowering her into a landing position starting with the rotation and then the translation of the hip. The rest of the pose is the easy part, and I’ll explain that again, because this method has really helped me to develop some really fine animation sequences and is making me much faster at producing them.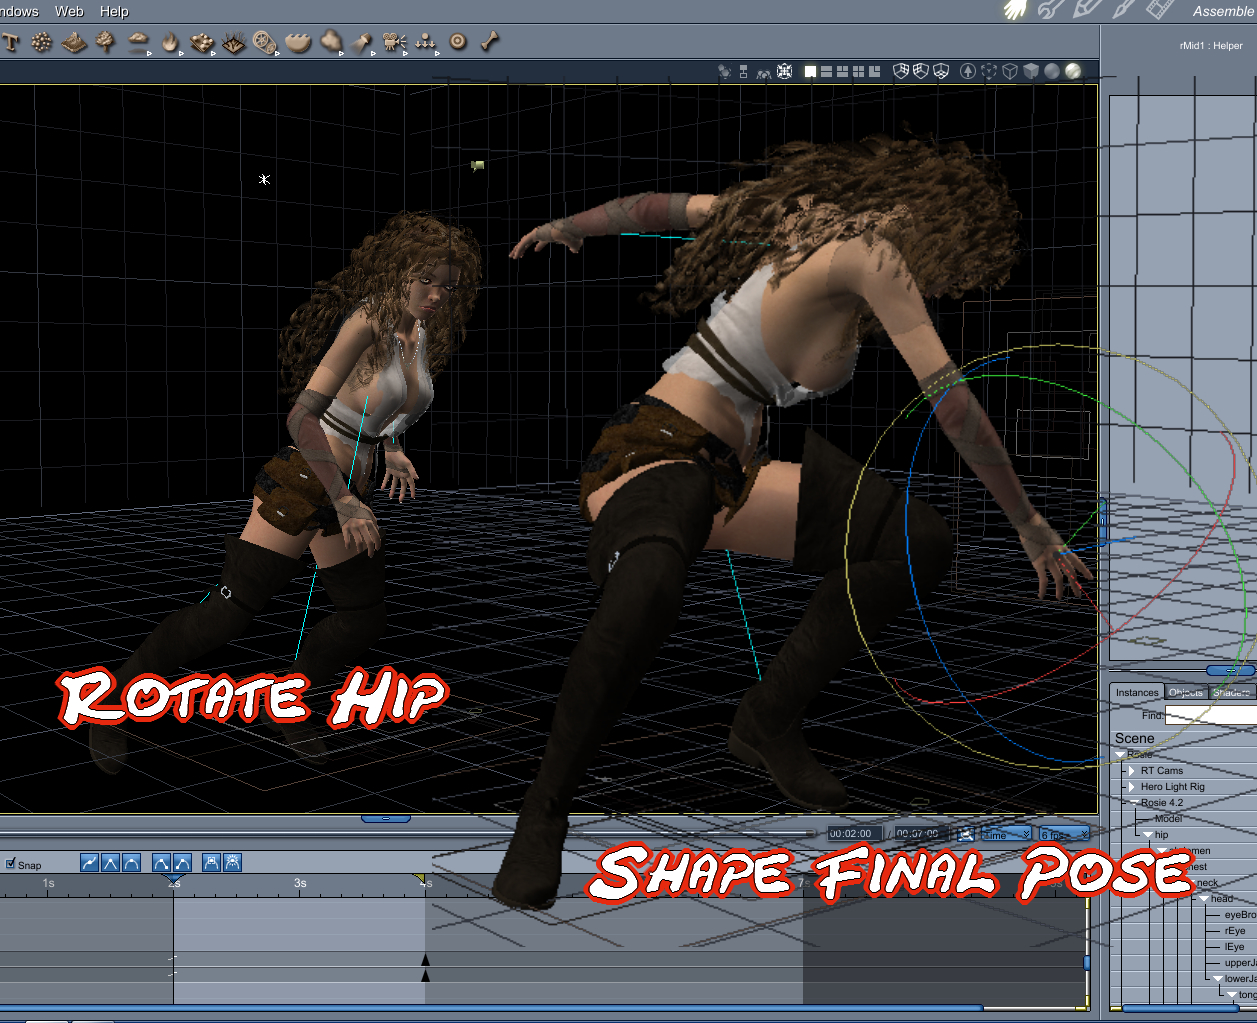
As with the first pose I’ve created, notice in the image that I begin with the hip, even though it really looks odd at first, and then create the rest of the pose. The reason that I say that the rest is easy is because I am rotating these joints by hand instead of applying a configured pose. Poses from purchased collections really are great to work with too, if that’s your inclination. I use those too. As a matter of fact, sometimes a particular pose that I have in a collection that I bought will inspire me to create a new animation. Or I’ll think of an action, and the perfect pose pops into mind that I bought a few months ago. These poses often ask me to turn off limits. When I’m importing an aniBlock, sure, I’ll let it turn them off for me. But for poses, I deny the request and simply fix any problems that the limits may have caused. This way I can use the limits as I create the poses of my own. Even if I use ready-made poses in my workflow, I still have to do some creating of my own, and I prefer to work with all of the limits in the ‘on’ position and work from there.
When I make my own poses, I make it a fun practice in sculpting. The medium is the figure and the joints are my tools. With the vision of my motion in my mind, I start with the first most prominent limb and rotate it into the ‘shape’ of the motion. Then I often work out the children of that main limb, and go back to what it might be the child of and finish off that whole limb before moving on to the next. As an example, I could start with one of the shoulders and work down to the forearm, hand, and then the fingers. But to finish off that limb I still need to shape the rotation of the collar before I can call that limb complete. Other times I might use a more freedom-style approach and start with one thigh, then the next, then each shoulder. Abdomen, chest, neck and head, and then one of the forearms, shins and feet until I eventually complete the pose. Instead of looking upon this pose as a daunting task, I look at it as a piece of art that I’m creating. The image above shows how I went from just rotating the hip (left) to completing the pose (right). Like all art, using the word complete is simply a ‘for now’ sort of thing. I tweak these things a lot, back and forth sometimes. Other times I’ll nail it, right from the start. Below we can see the resulting motion from 2 seconds to 4.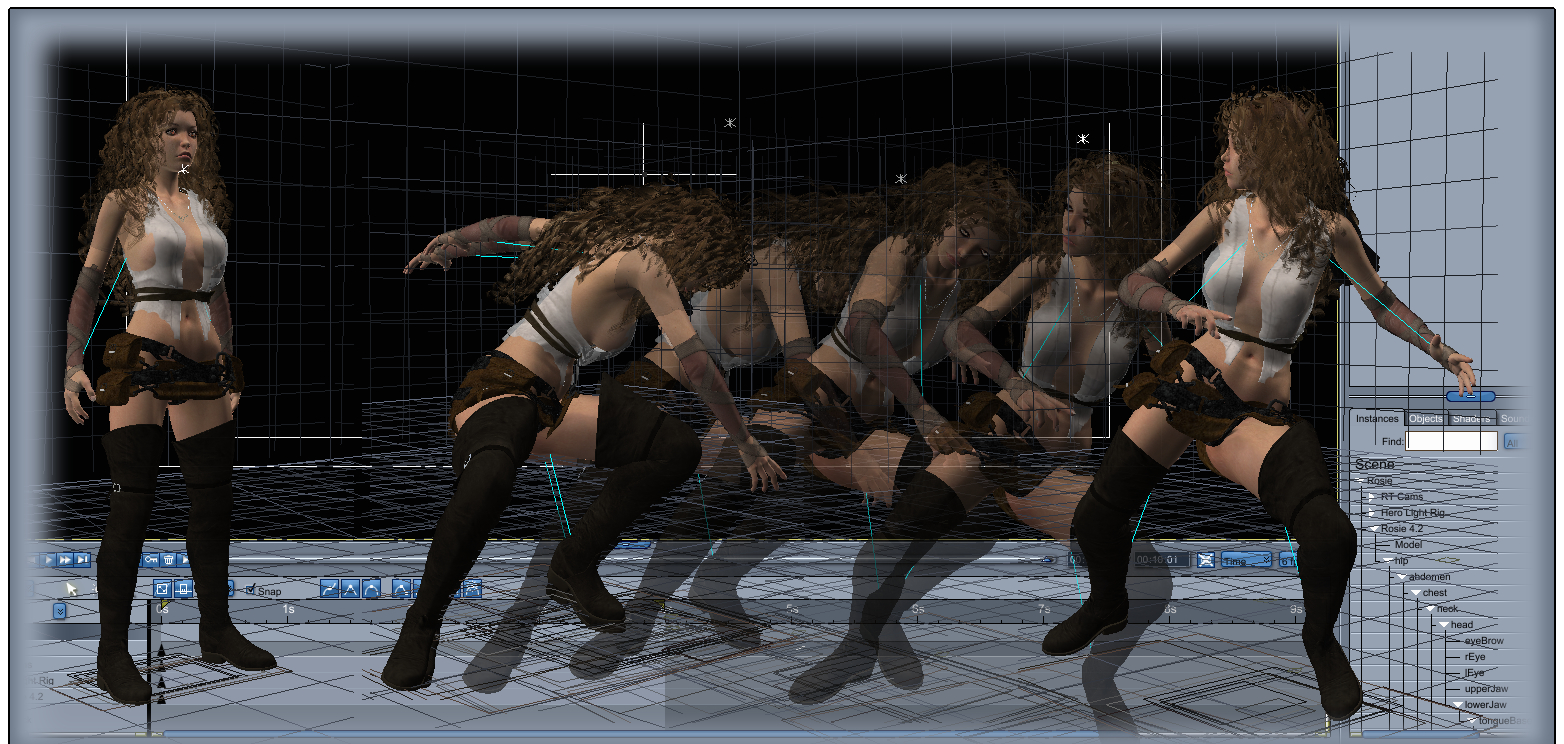
As you can clearly see, the neutral pose no longer fits with this motion. I knew that when I created the second pose. So lets rotate that hip again and sculpt out a good initial pose – something that she can land from. 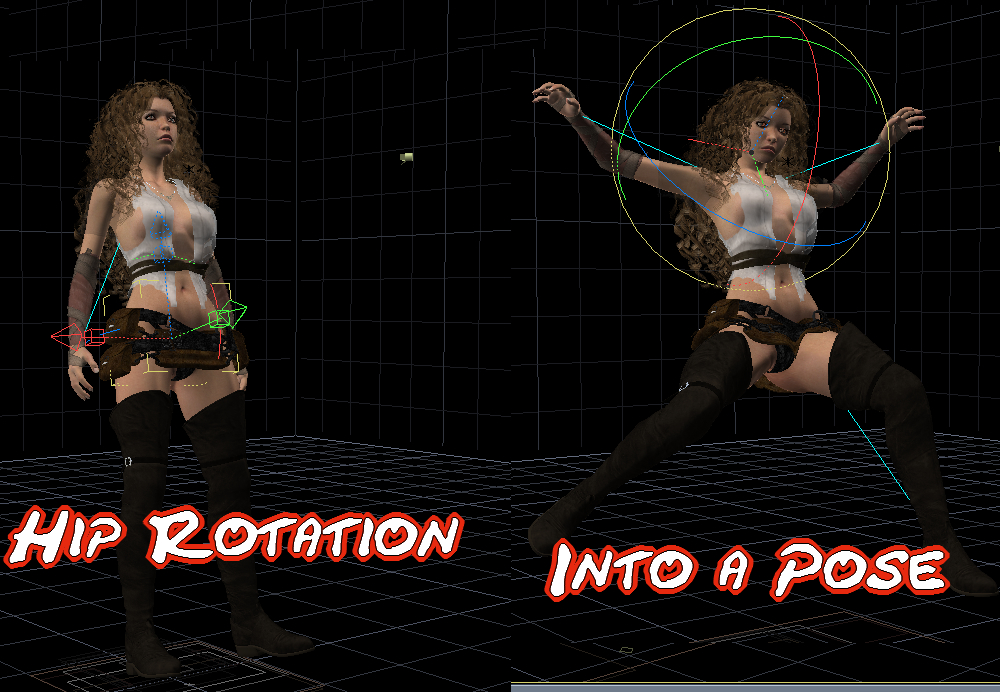
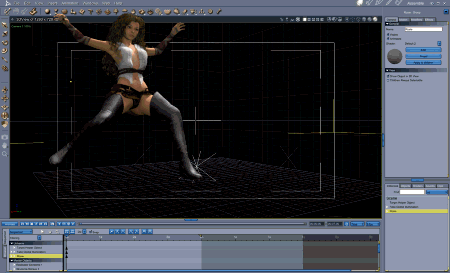
That should work for starters. Lets do a quick test render and see how we did.
Not too bad for three simple poses, eh? Just three! In the next Carranimation article, we’ll dig in and work out some more believability. So we’ll be working with tweeners and weight distribution and reactive motions. See you then.


