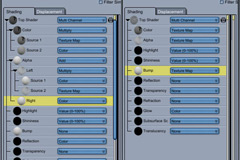
In this first installment, I begin to cover the complexities of Carrara’s powerful shader system. This is part 1 in a short series intended for new users of Carrara. In Part 1 I start by loading Daz3d’s V4 figure and demonstrate how to perform simple shader tweaks to get her to look properly. Part 1 ends as we begin to explore how to make full use of specular and bump maps, and I’ve already provided a decent amount of detail to get one going on adjusting the Highlight and shader channels, with some measure of explanation towards what they do together, with the available light in the scene.
By the end of this series, I’ll have covered a simple outline to shaders – but hopefully enough to get Carrara users in to that texture room with a bit more understanding of what’s going on. After I complete more in the general walkthrough topics, I’s like to revisit many topics, such as this one, and explore in much greater depth. Shaders are a really in depth topic in Carrara, as there is so much that we can do inside that console – to get our models looking however we want them to look. One of my favorite aspects of Carrara!
