Originally posted by evilproducer at the DAZ3D forum here. Comments and questions should be posted there. Here we go:
First off, I’m not the one that came up with this method, and unfortunately, I don’t recall who did, as that information is lost in the pit of the Old Forums. If you posted about this in the past, then please step up and take a well deserved bow!
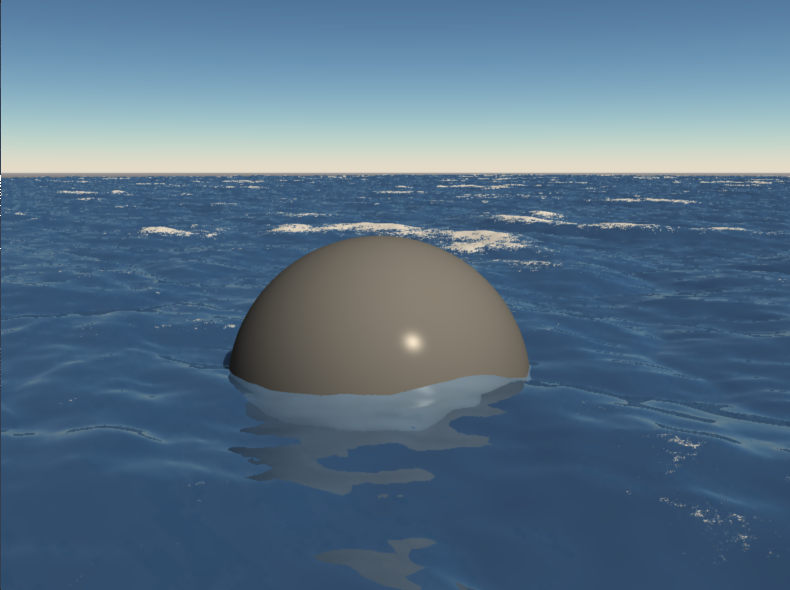
To create animated foam on the Ocean Primitive, you can use some basic shader functions in a creative way.
This is a medium scaled scene, so units of measure are based on that. Also, this is meant as a suggested method, not a definitive way to create foam. Scenes vary so this just outlines the steps I took and why.
The first thing I did was to load an Ocean primitive and change the size to 100 ft. I think you will find this looks better later on, when the ocean is replicated. For now, I would leave the wave height alone, unless you wish to increase it. A lower height wave may make it harder to find the right settings for the shader that will be created or modified.
The next step is to create the shader. You can modify the existing shader or create a new master shader. Personally, I found it easier to create a new master, and then work my way down, beginning at the Color channel.
In the Color channel, I added a color gradient and set the right side to white, and the left to a blue color. The white end of the gradient will be the foam. To drive the gradient, I chose to use Snow under Terrain Distribution. I then tweaked the coverage and noise, and lowered the noise scale to .02 ft. I then selected the Altitude tab and adjusted the settings, keeping an eye on preview window. Depending on the desired effect, the parameters will vary.
Next, I copied the snow distribution shader from the Color channel and pasted it in the bump channel.
I then added a color gradient in the Reflection channel, The gradient used black to the right, and white to the left. The reason for the black on the right, is because the foam isn’t really reflective, and black doesn’t reflect. To drive the gradient, I placed a Mixer, and in the top slot of the mixer, I left it empty, which for all intents and purposes is treated like pure black- meaning no reflections. I copied the snow shader from the color channel and pasted it into the second slot of the mixer. Remember, the gradient is reversed from the color channel with white (100% reflective) being the main body of the ocean, and the “foam” snow being black and not reflective. I placed a 1-100 value slider in the Mixer slot and adjusted the slider until I had the desired amount of reflection.
The Transparency channel also uses the reversed color gradient, but instead of pure white on the left, I placed a grey color. To drive the gradient, I again copied the Snow distribution shader from the Color channel and pasted it into the grey/black color gradient in the Transparency channel. The idea being that black is opaque, and by comparison, the foam is fairly opaque. The grey color on the other side of the gradient means the main body of water is not totally transparent. The grey color also means that it doesn’t add unwanted color to the water.
I did use Absorption and In-scattering. Check the settings out to see how it works:
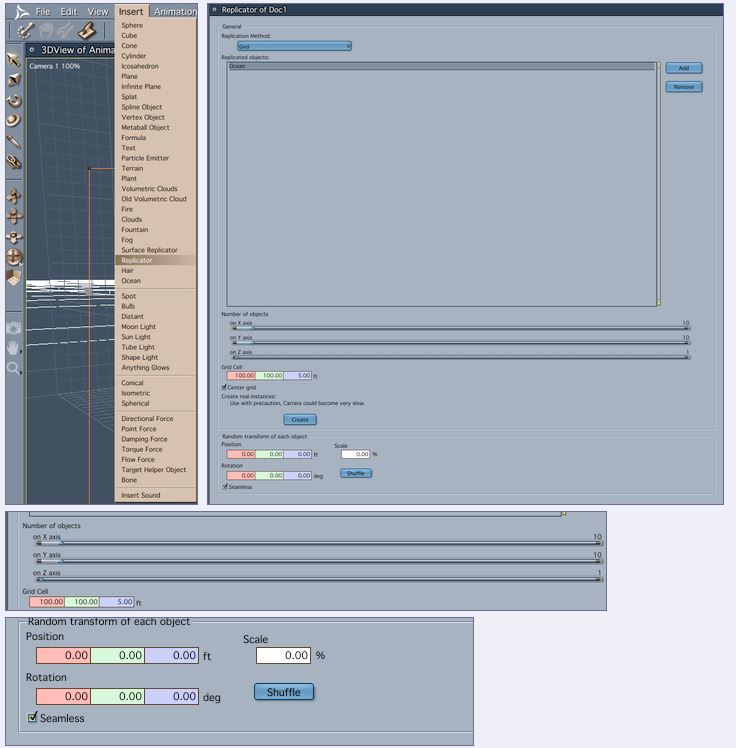
To set up the ocean, I mentioned above that I changed it to 100 ft. The reason being is that I wanted to place it in a replicator, and the more area the ocean had, the less obvious it was being tiled.
So, at the top of the Menu Bar I chose Insert—> Replicator. I then selected the Replicator in the Instances Palette and clicked the wrench icon at the top right of the screen to open the Replicator editor. The first thing I did was to change the grid size in the X and Y coordinates to match the size of the ocean. After that, I enabled the Seamlessly checkbox in the lower left corner of the editor. In my scene, I left the replications at the defaults, but you can enter whatever value you want.
Now, the really cool thing about the oceans (and also terrains generated with the terrain editor), and why I enable the Seamlessly option, is that they tile seamlessly, which is pretty cool when you consider that the ocean primitive is animated.
Remember that the foam is animated by the changing height of the waves due to the elevation parameters of the Snow Distribution shader. The higher the wave goes, the more “foam” or snow it gets. As the wave lowers, the foam disappears.


 Saving...