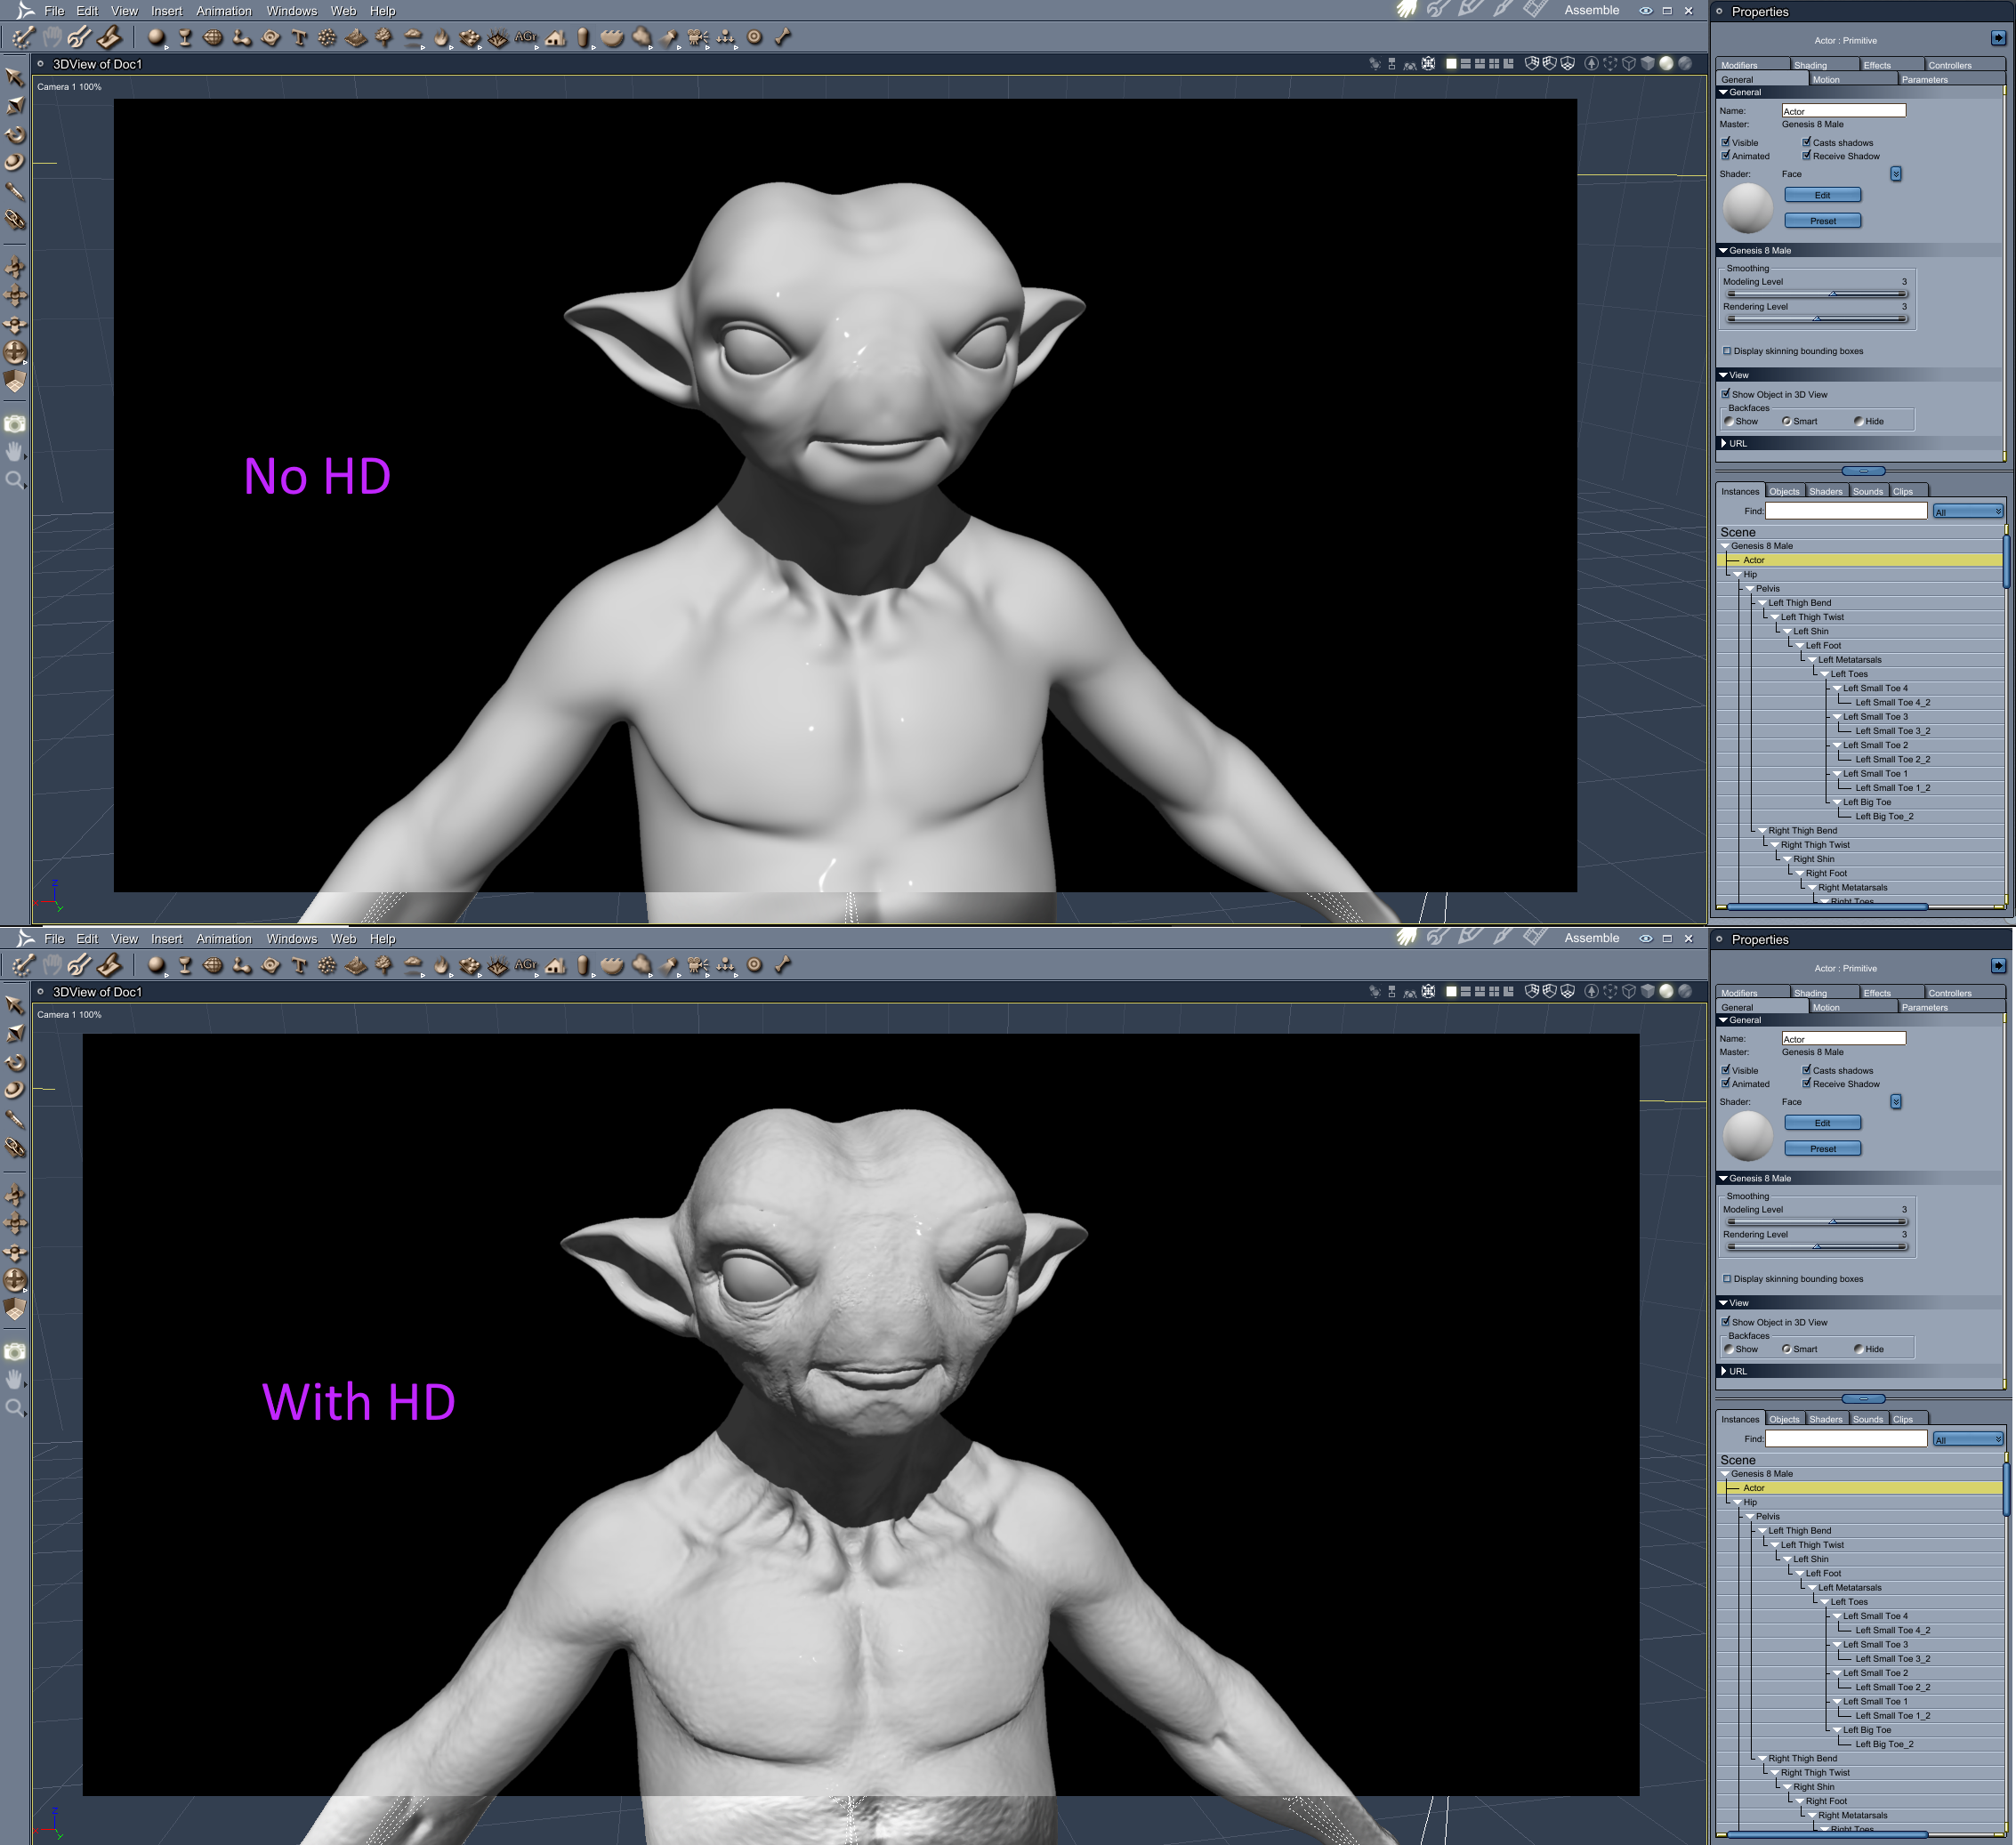
Philemo released another Carrara plugin at the end of April in 2019, the HD Morph plugin for Carrara, that supports high resolutions characters import into Carrara or even making your own HD content inside Carrara. Here is an early test render from Bunyip of Marvin the alien for G8M: https://www.daz3d.com/mervin-the-alien-hd-for-genesis-8-male
The DAZ3D forum thread here has a lot more infomation and renders:
https://www.daz3d.com/forums/discussion/302941/any-news-on-the-hd-plugin-d/p2
Download the plugin and others at: https://sourceforge.net/projects/carrara-time-savers/
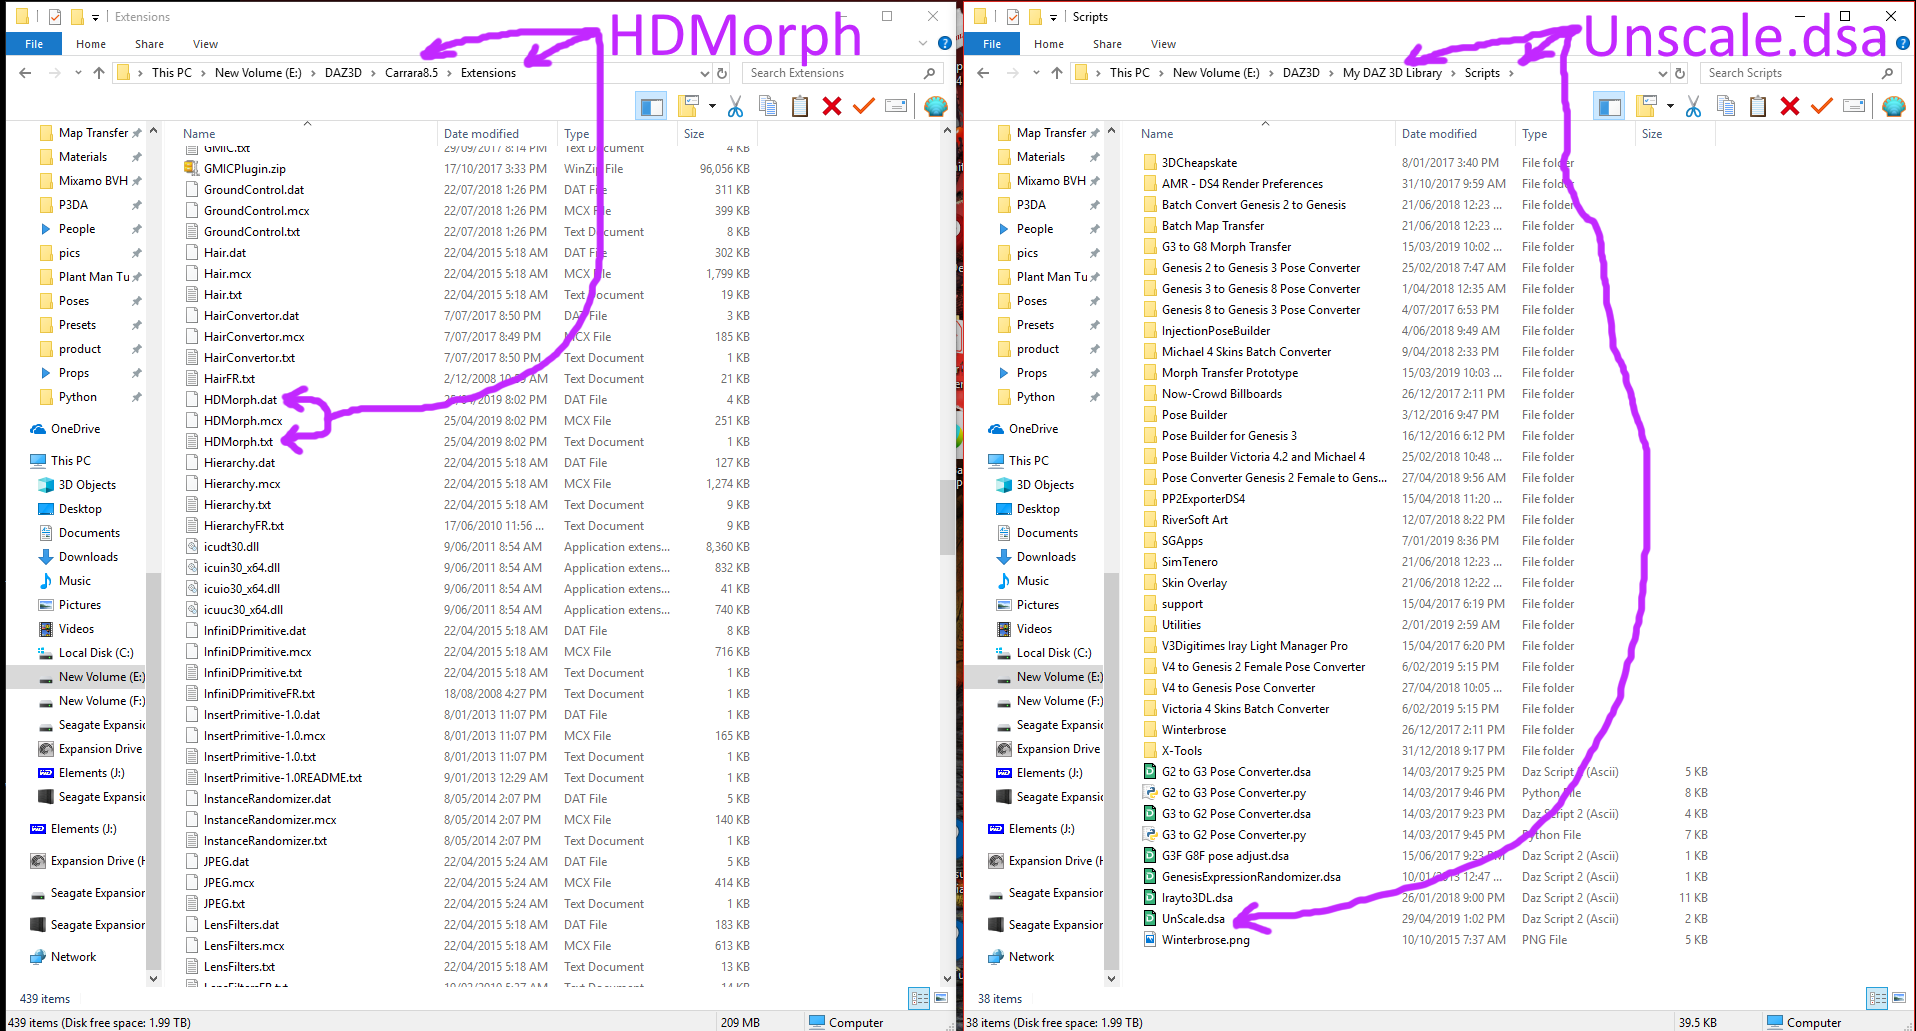
The Carrara files should be copied as usual to the Carrara Extensions folder, a bit new for Carrara users, is the Daz Studio scaling script that must be copied to the Daz Studio folder, to solve issues with some characters, here is a screnenshot showing the folders:
Here is the first tutorial from Philemo himself:
Dartanbeck more detailed step by step guide clearifies some of the steps, using the Gianni 6 HD character as an example:
“And just to clarify, in Step 4 and Step 5 of the tutorial, he is first (step 4) importing the exported (from DS) HD morphed figure as an OBJ with his import notes applied, and then in step 5, he’s loading in the figure that we would otherwise use the morph on into the same scene, with the obj from step 4.”
An example:
If we’re going to use a Gianni 6 HD morph,
- Step 1 – in Daz Studio we’d load in Gianni 6 HD character preset
- Step 2 – since this is a Character Preset, this step should already be done (but check his notes just to see what it means)
- Step 3 – export as obj from Daz Studio – see Philemo’s notes
- Step 4 – In Carrara, Import the obj we’ve just exported from DS – see Philemo’s notes
- Step 5 – In the same Carrara scene, load Gianni 6 HD Character Preset from your library – see Philemo’s notes
- Step 6 – with Actor selected, make sure that the smoothing levels in Carrara are the same as they were in DS from Step 2
- Step 7 – with Actor selected, add the Philemo > HD Morph modifier
- Step 8 – click Choose Target
- Step 9 – in the list, select the obj we’ve imported from DS (step 4)
- Step 10 – Celebrate… we’re done!
- Step 11 – may now delete the imported obj (step 4) from the scene.
Good luck and post your renders in the forum thread: https://www.daz3d.com/forums/discussion/302941/any-news-on-the-hd-plugin-d/p1
Promo image of Boris G2M with RAW veins, rendered by Wendy.


