Hi all, I originally started this scene with the idea of making something saleable. As I progressed with it, I knew I had a lot to learn and that there were some issues with it that would make it easier almost to start from scratch. I still think this is a really cool scene, with some neat ideas, and hate for it to sit on my hard drive for only me to use. As such, I am making it available as a free scene for anyone to use.
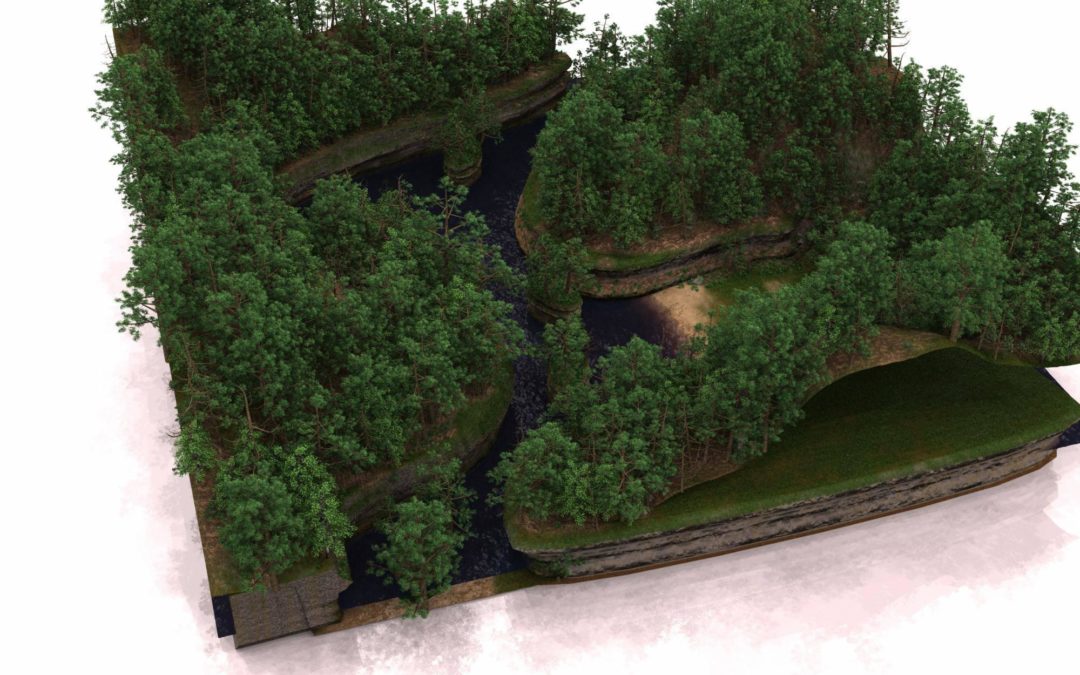
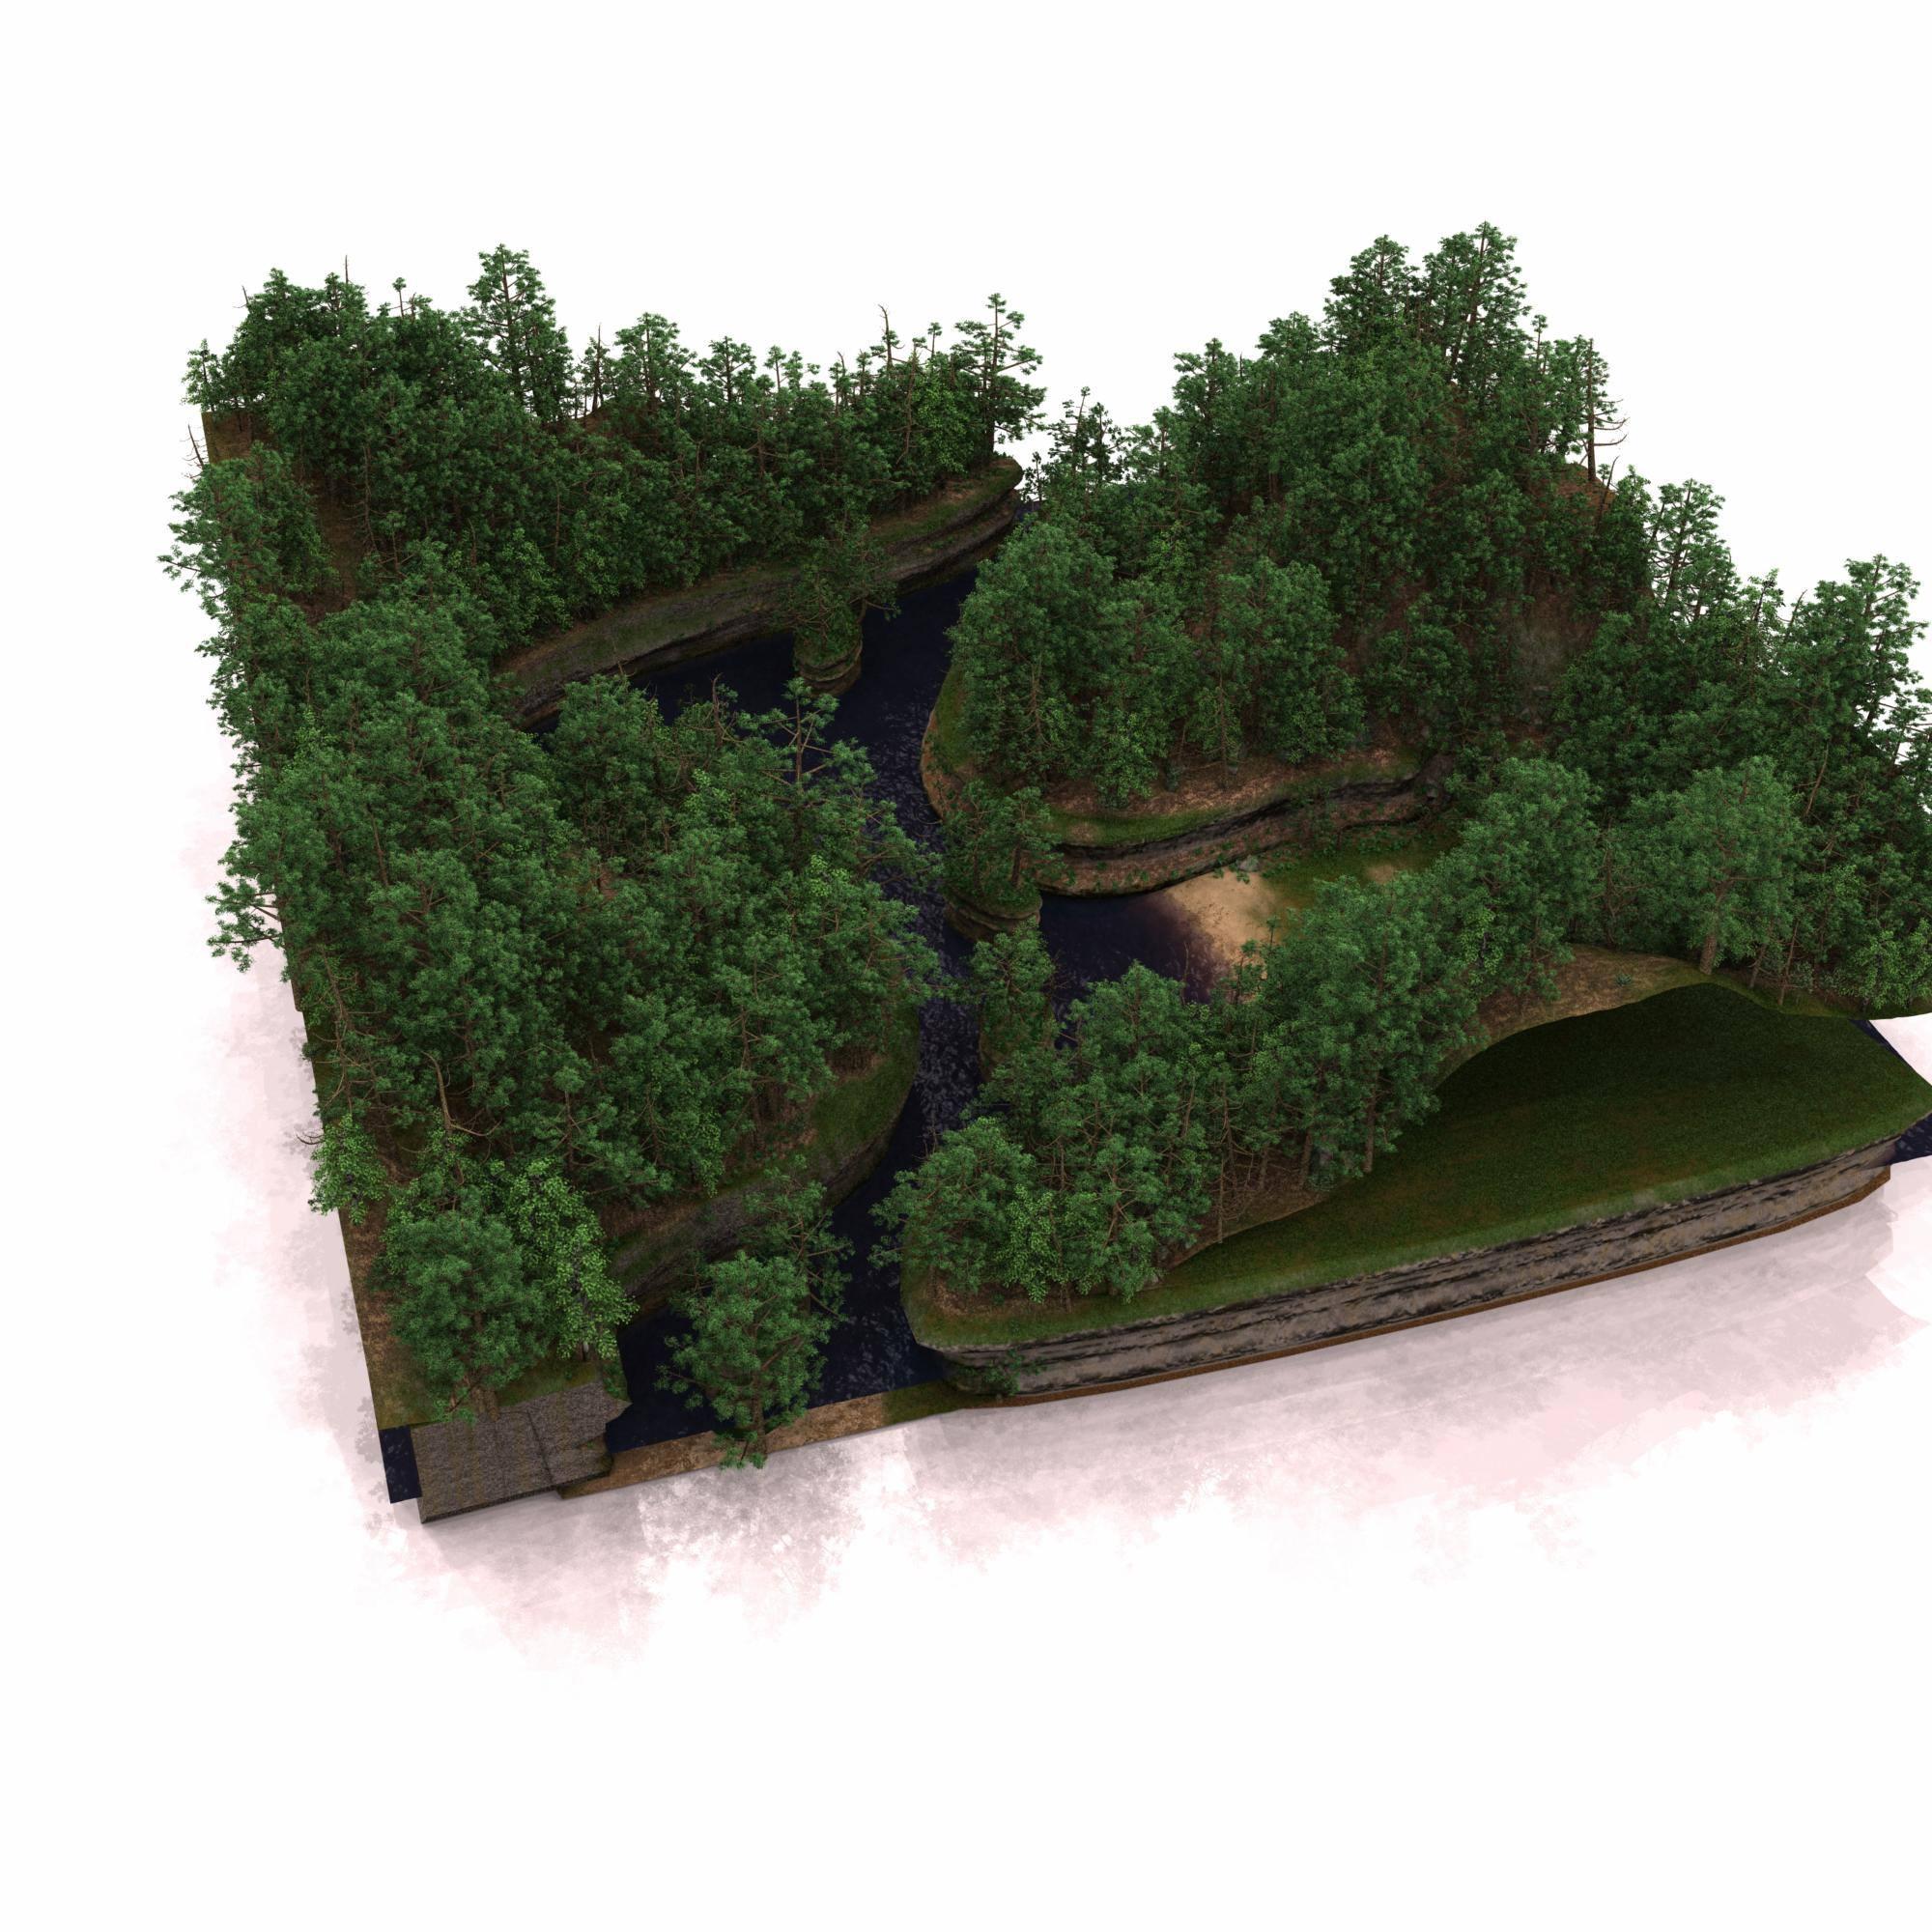
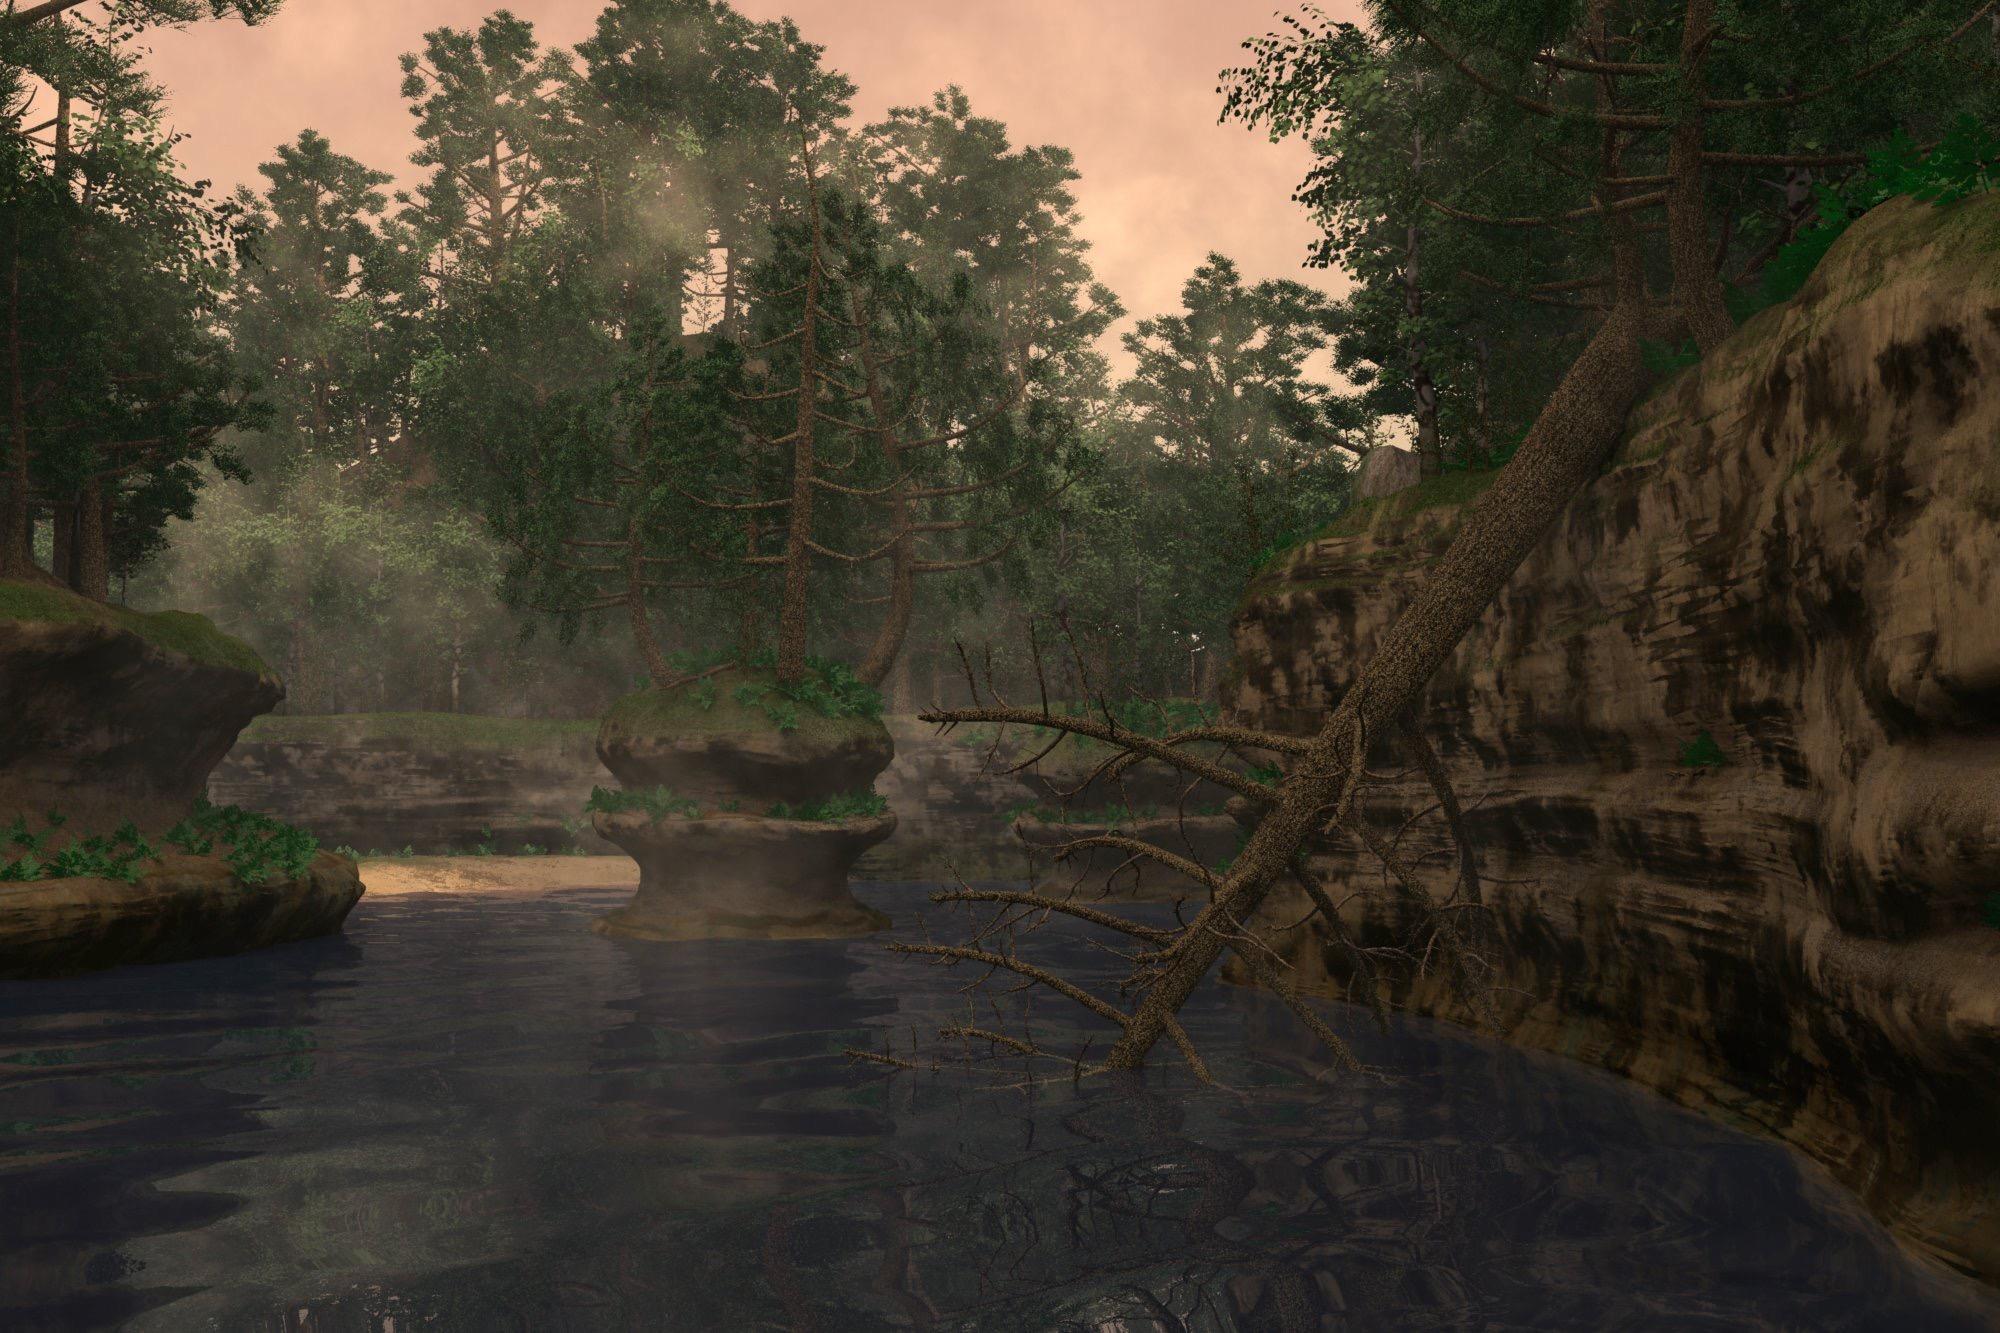
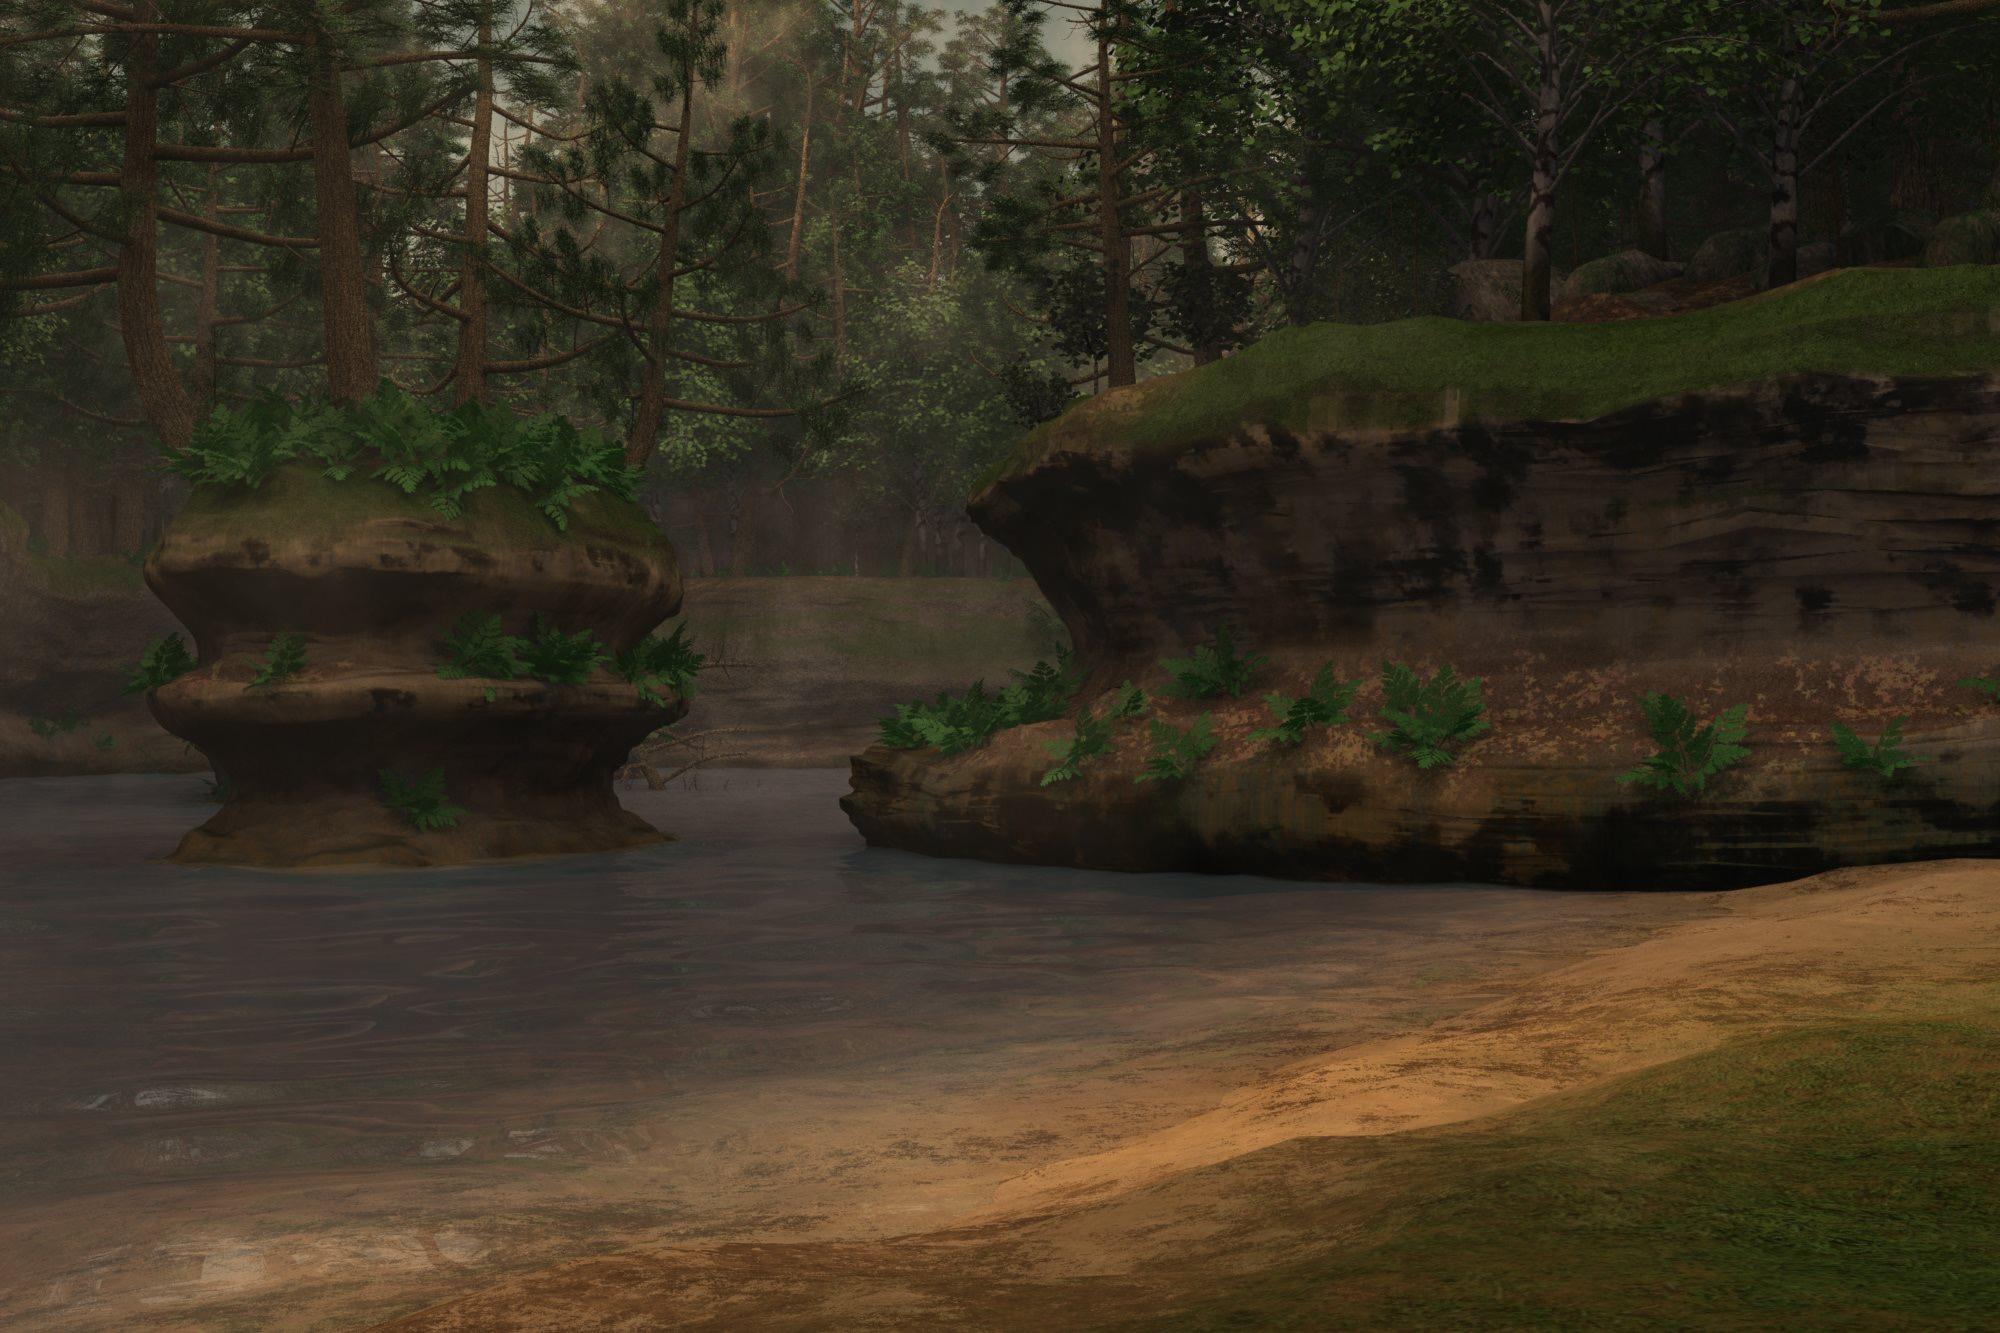
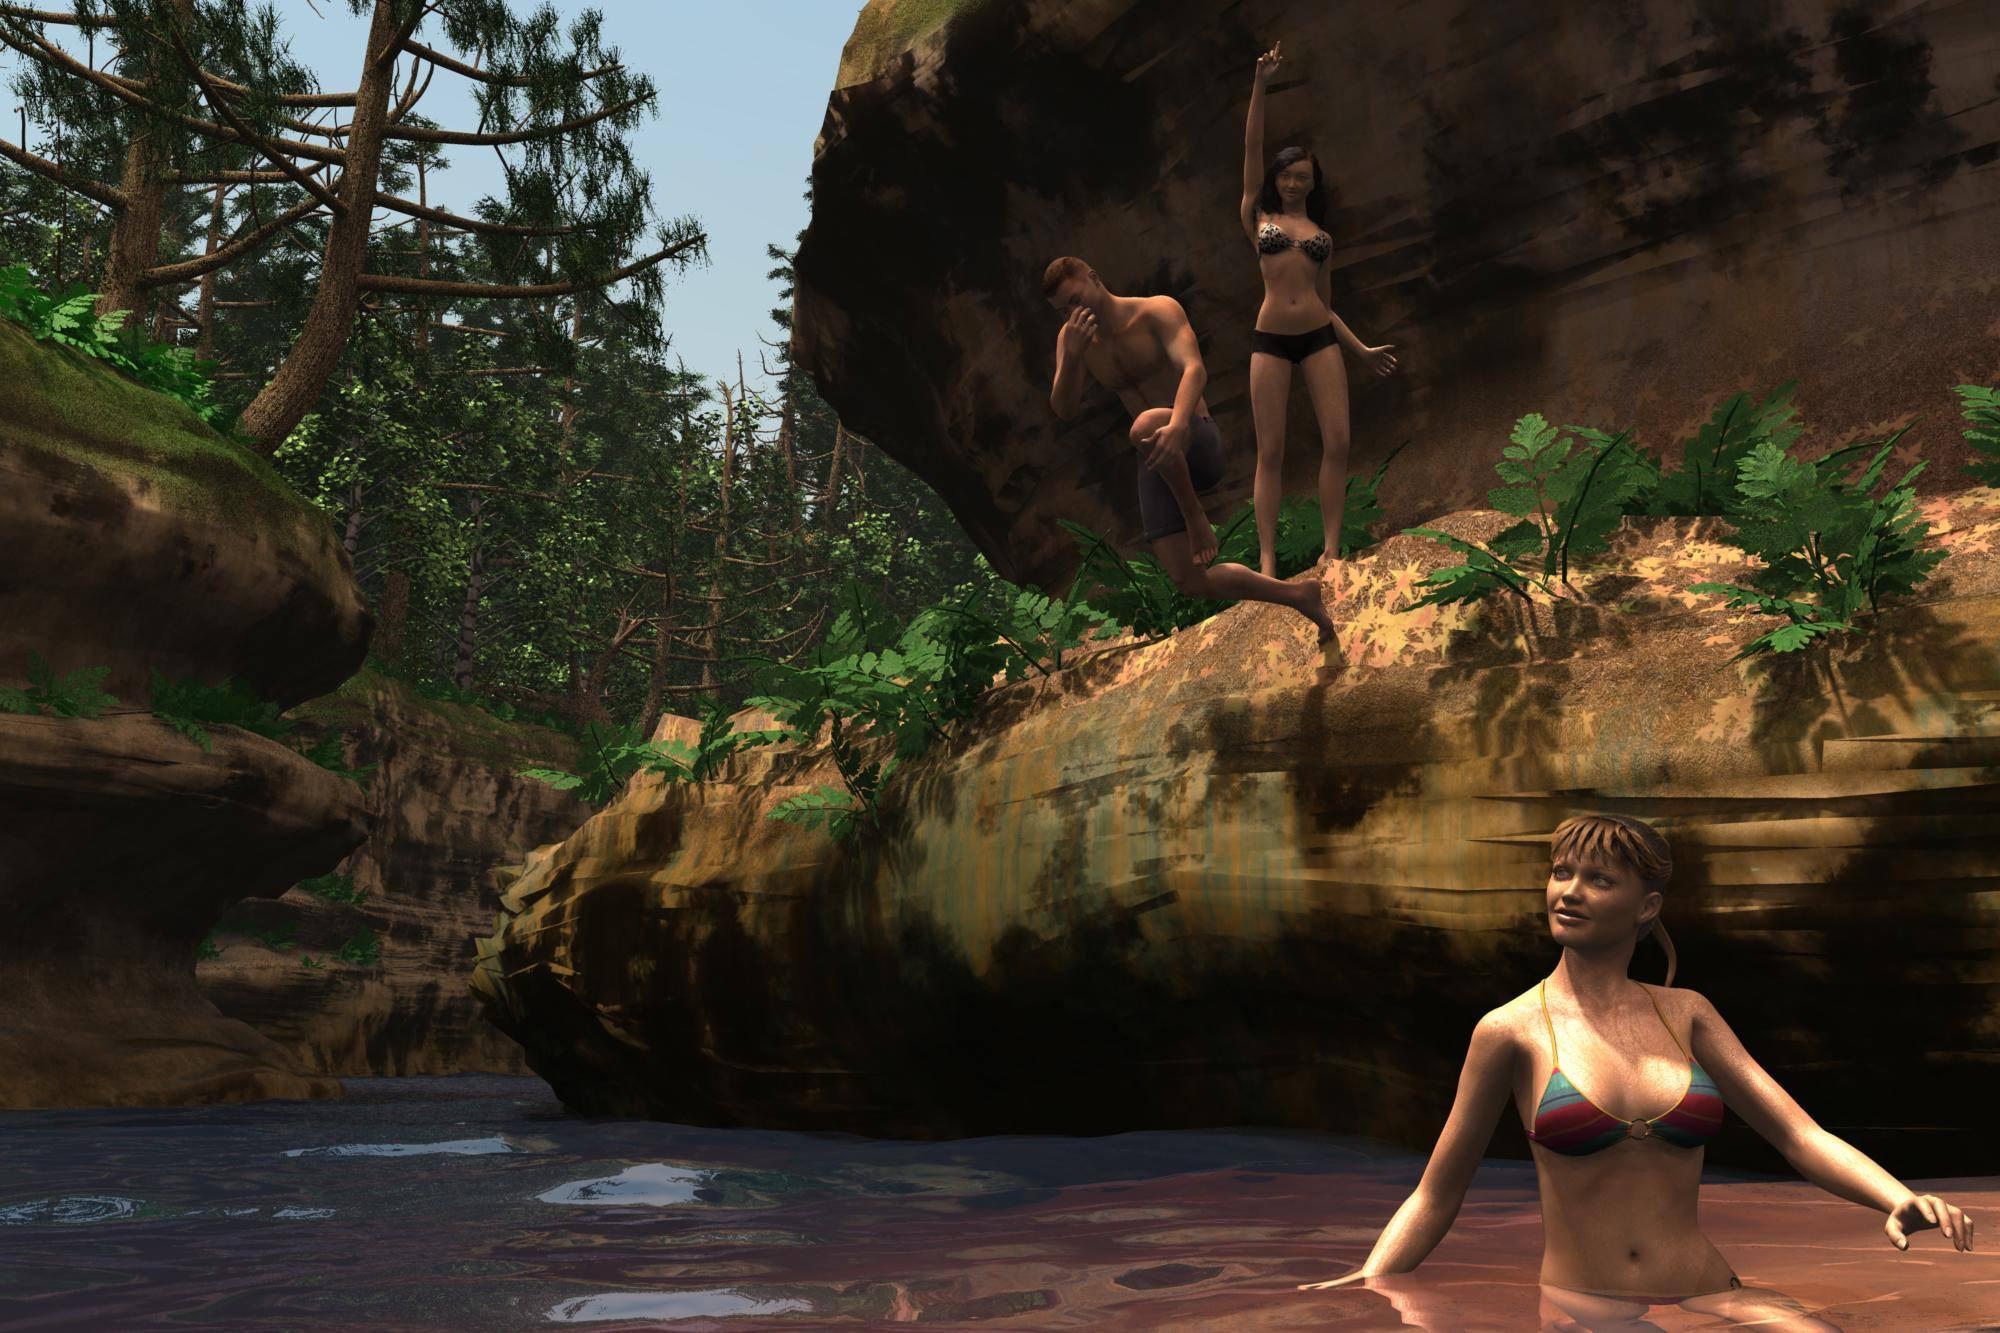
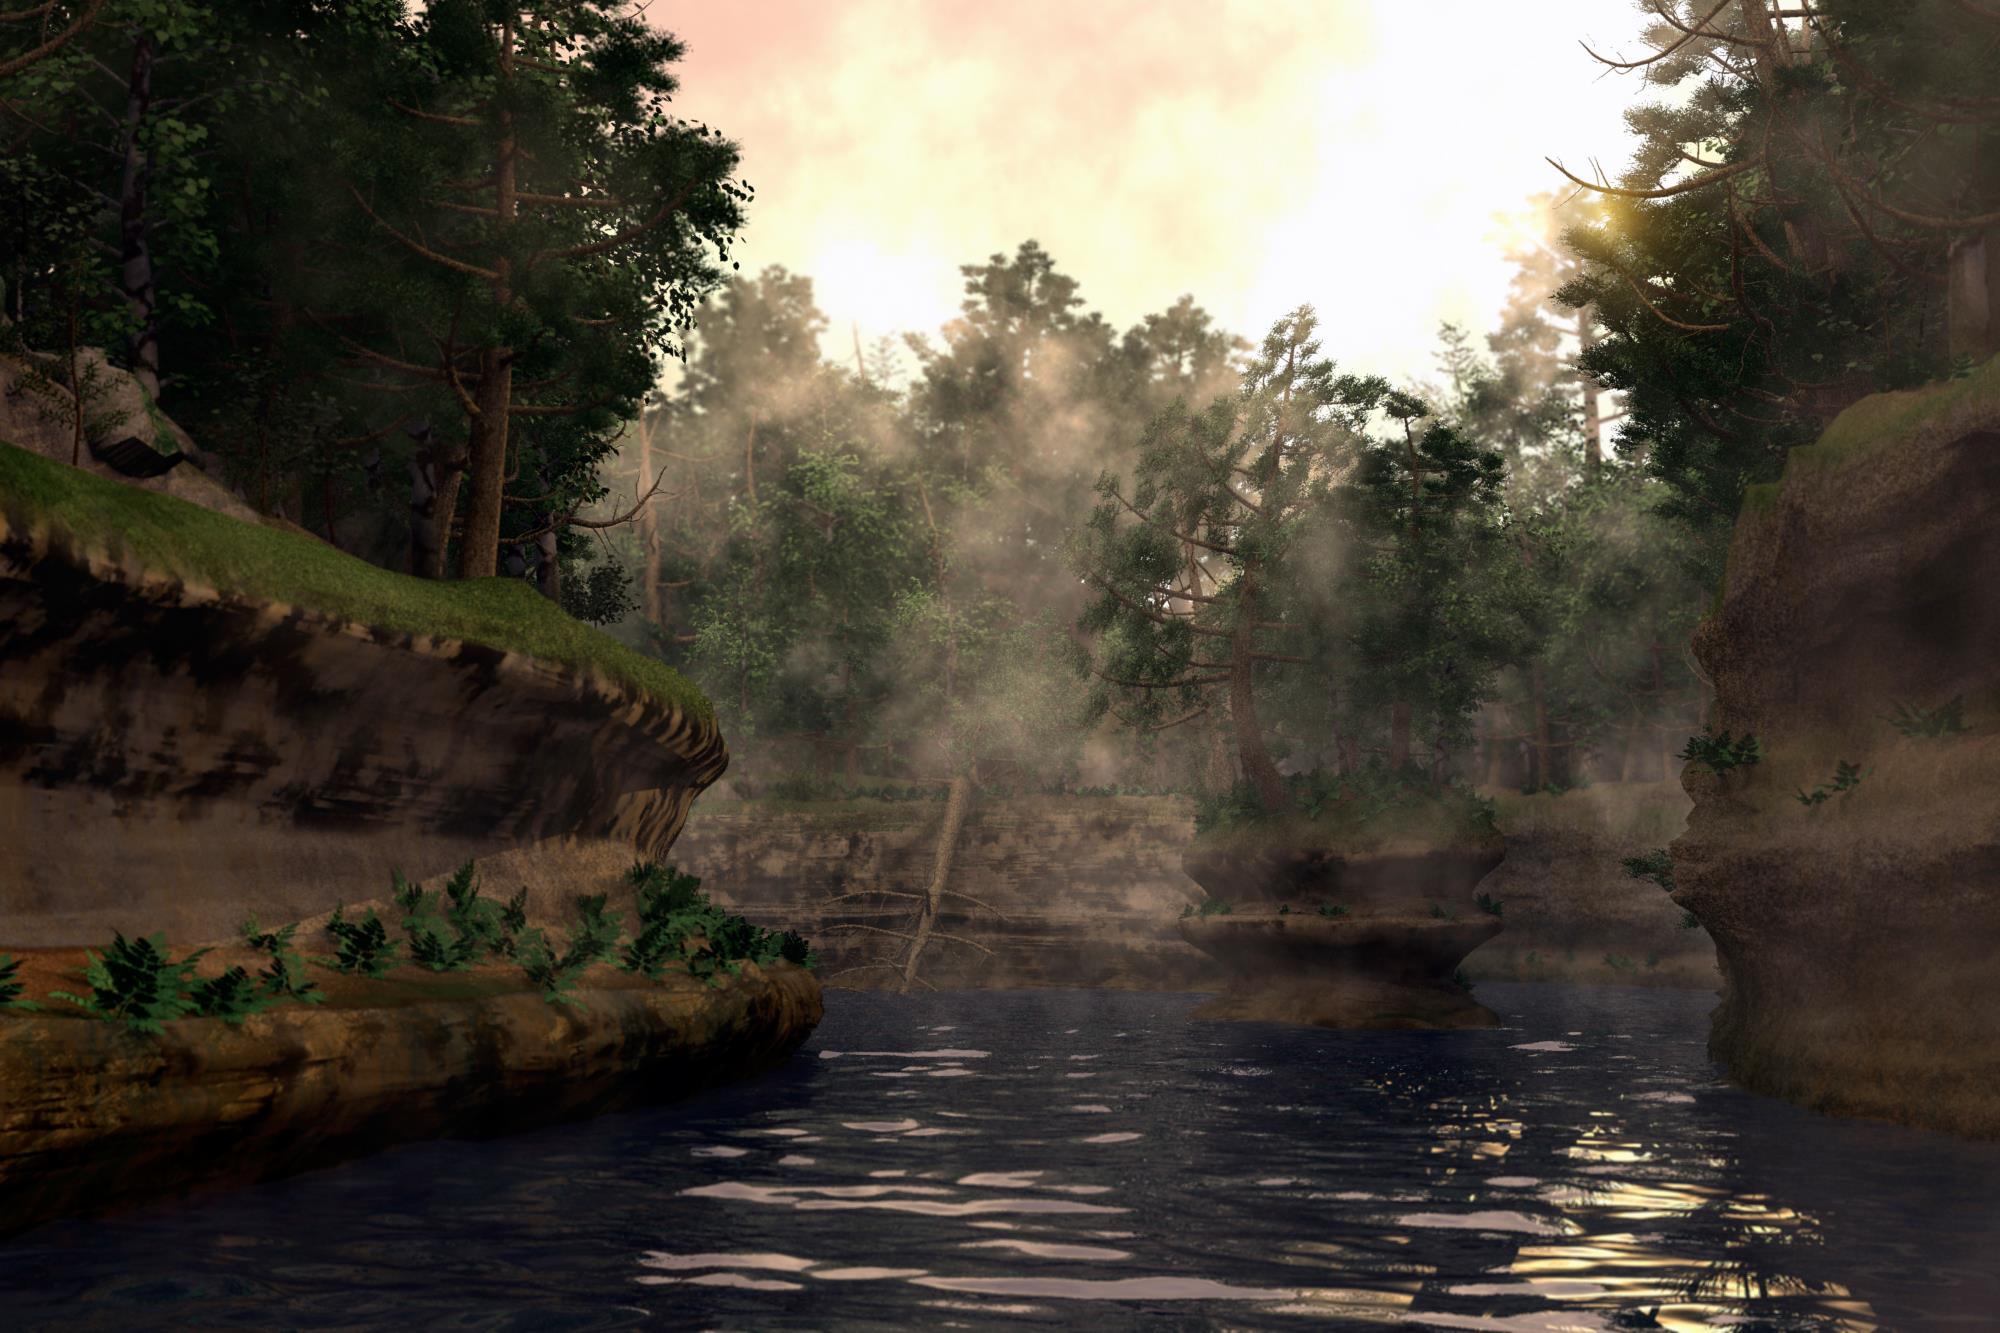
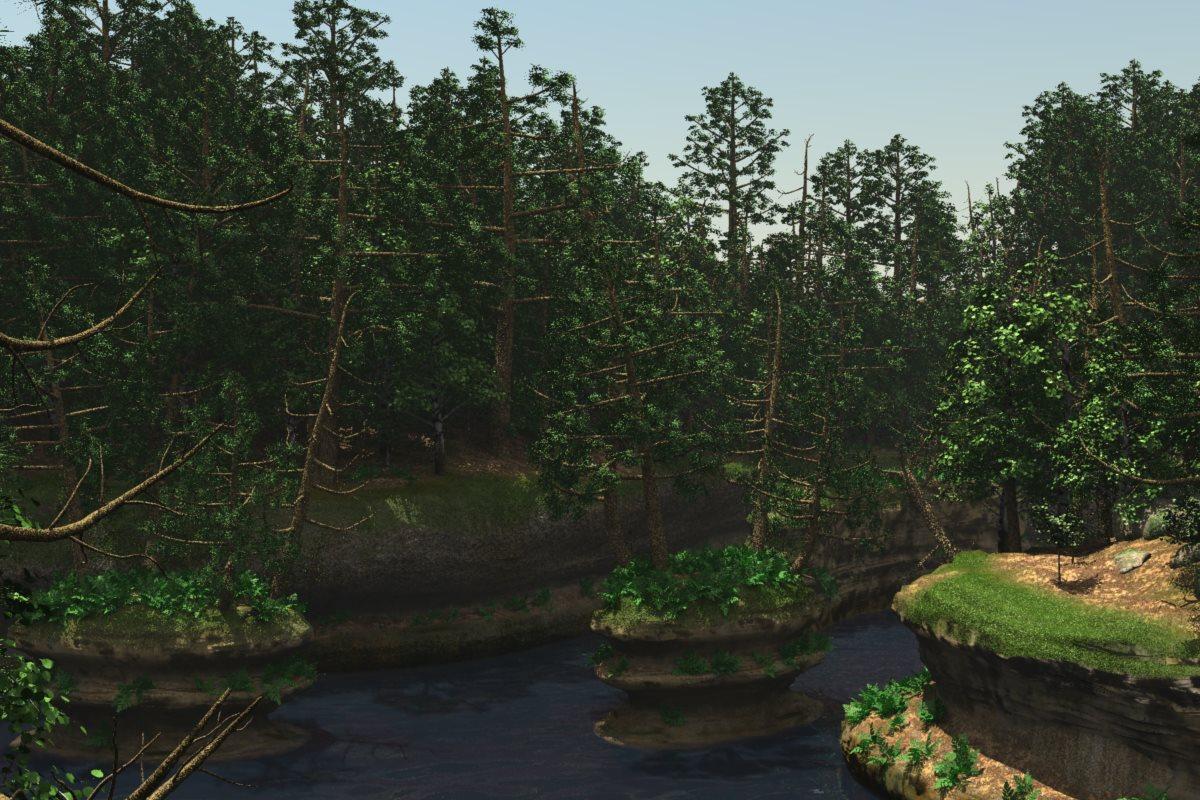
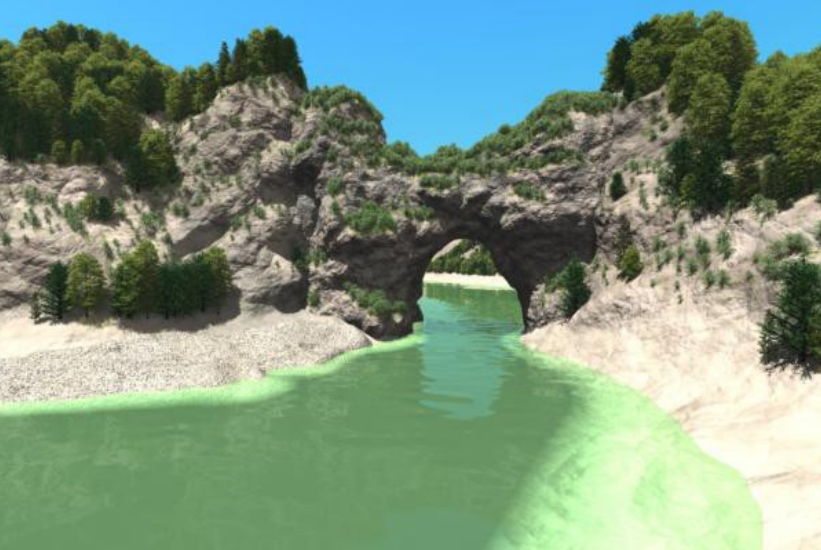
The scene is my artistic representation of the Wisconsin Dells area of the Wisconsin River. This is not a specific stretch of the river or specific rock outcrops or islands. It is just supposed to be suggestive of the unique geography of the area. The size is approximately 500′ x 500′.
The islands are not attached to the terrain and can be moved, removed, duplicated, etc. as you wish. The islands have their own replicators for trees and plants, as well as the cliffs. The scene makes heavy use of replicators and they are set up in a somewhat modular way, in that if an area of the scene is not in view, there is a good chance you can hide a replicator or two to speed up your render time without effecting what the camera is seeing. In the midday scene I tried an experiment with putting a large sphere around the scene and wrapping a spherical render around it to give the illusion of a larger world. This is nothing new, except the experimental part for me, was rendering it with an alpha where the sky would be, so that you can still use a realistic atmosphere, clouds, etc. without being hemmed in by the sphere. Unfortunately there is some fringing where the alpha meets the tree line. Still, unless you are aiming the camera out at the sphere directly it does a fairly nice job extending the scene. Feel free to delete it if you don’t like it.
I have a couple different fern plants. They are both vertex objects. One is higher res fern with a painted texture using Carrara’s 3D paint brush. The other is a lower res fern with a procedural shader. They are located in the River Dells plant folder (which can be added to your Object Browser). If you are doing a scene with ferns close to the camera, I would recommend adding the hi-res fern to the needed replicator and deleting the default lower res fern. Check first, because I may have experimented with the higher res ferns in some of the replicators and forgot to switch back to the lower res fern.
Anyway, here is the link. If you have any questions, please ask! Also, I would love any comments you have about the scene, as well as constructive criticism so that I may inprove my terrain and environments in the future.
The file is in my Dropbox. There is no membership requirement to download. I was aslo going to put it up on ShareCG, but the uploader chokes on me. The file is around 107 MB zipped. https://www.dropbox.com/s/1q869tm9v28yvd3/River-Dells.zip?dl=0
“As you probably have all noticed, I’m not really active in this space anymore. After DAZ dropped me along with the other Carrara vendors, I tried to leave my old store up, but between WordPress and PayPal updates, it just doesn’t work anymore.
That
link is case sensitive, so type it in exactly like I have it there.
Thank you for your support and encouragement over the years when I was
developing these, it was a period of my life that I will cherish always.
SECOND of all, I am willing to make the entire library of my Carrara 8 source code available to anyone who wishes to take up the mantle. This includes both my privately published plug-ins as well as the ones formerly sold at DAZ (and a few that were never released). …”
“P3DO goes another step forward with 2.7 and the growing integration of DAZ Studio assets in its workflow. P3DO first Daz Studio DUF format support was a Pose viewer with 2.5 in 2016. This time we went much further and P3DO now shows the DUF assets references the same way it does for Poser. There’s also the usual bunch of improvements and fixes as listed below.”
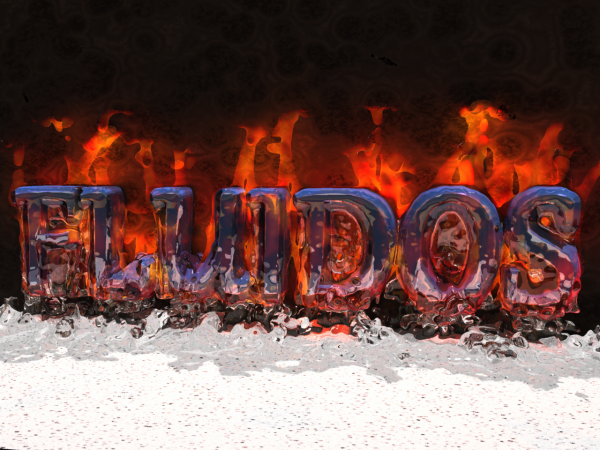
Alberto write: “FLUIDOS II is a fluids simulation plugin for Carrara 8 and 8.5.
FLUIDOS II incorporates high-performance OpenVDB tools for meshing, filtering, level sets, and pressure projection. Besides the superior quality liquid simulation, now it includes other fluids types: Smoke and Volumetric fire.
FLUIDOS II is faster, more powerful and versatile than its predecessor.
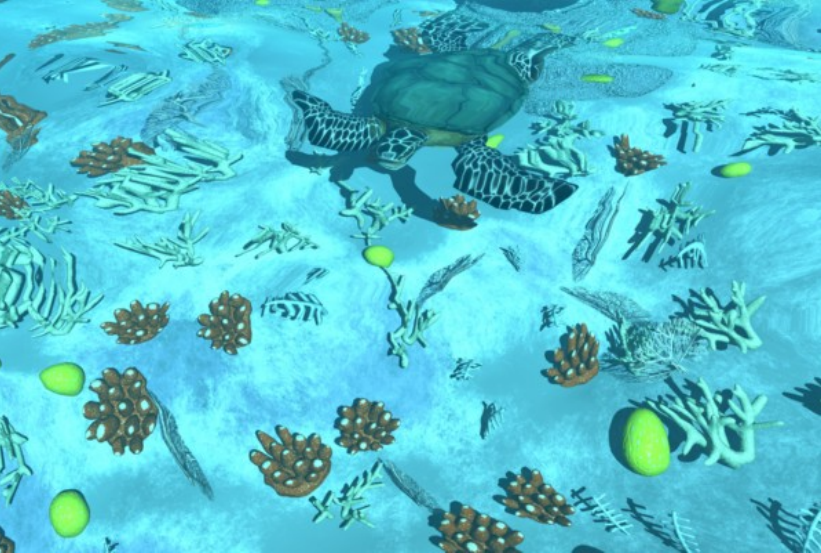
The plugin is a volumetric primitive that can be used to create deep and turbid waters. Light is attenuated through the volume so like in real lakes and oceans the deeper you get the less the light penetrates and objects in the volume get darker and darker. Colours also attentuate differently depending on the depth and distance through the water.
If you have done an underwater scene before you may have used the Scene Atmosphere or Fog to get close to such an effect. This plugin allows you to avoid doing that – which is particularly useful for a scene that requires views both in and out of the water. If you change the atmosphere then anything above the water will look wrong. This short video (which I did early on in the project) shows the effect.
When a body of water is viewed from above the surface the existing Carrara shader absorption settings will work to make things get darker as they approach the Attenuation distance but once you get down into the water the shader is of no help. I explain this in more detail inmy Laboratory.
The plugin can work with multiple surface objects to create the right interactions between the surface of the water and the volume. It checks if the ray is above or below the surface so the volume effect only happens below it. It can also work with exclusion zones to create an aquarium or submersible vehicle and inclusion zones to create a fish tank.
The visibility and other settings can be adjusted to make the water murkier with details explained in the user manual. I couldn’t figure out how to add light beams but caustics work well on objects in the volume.
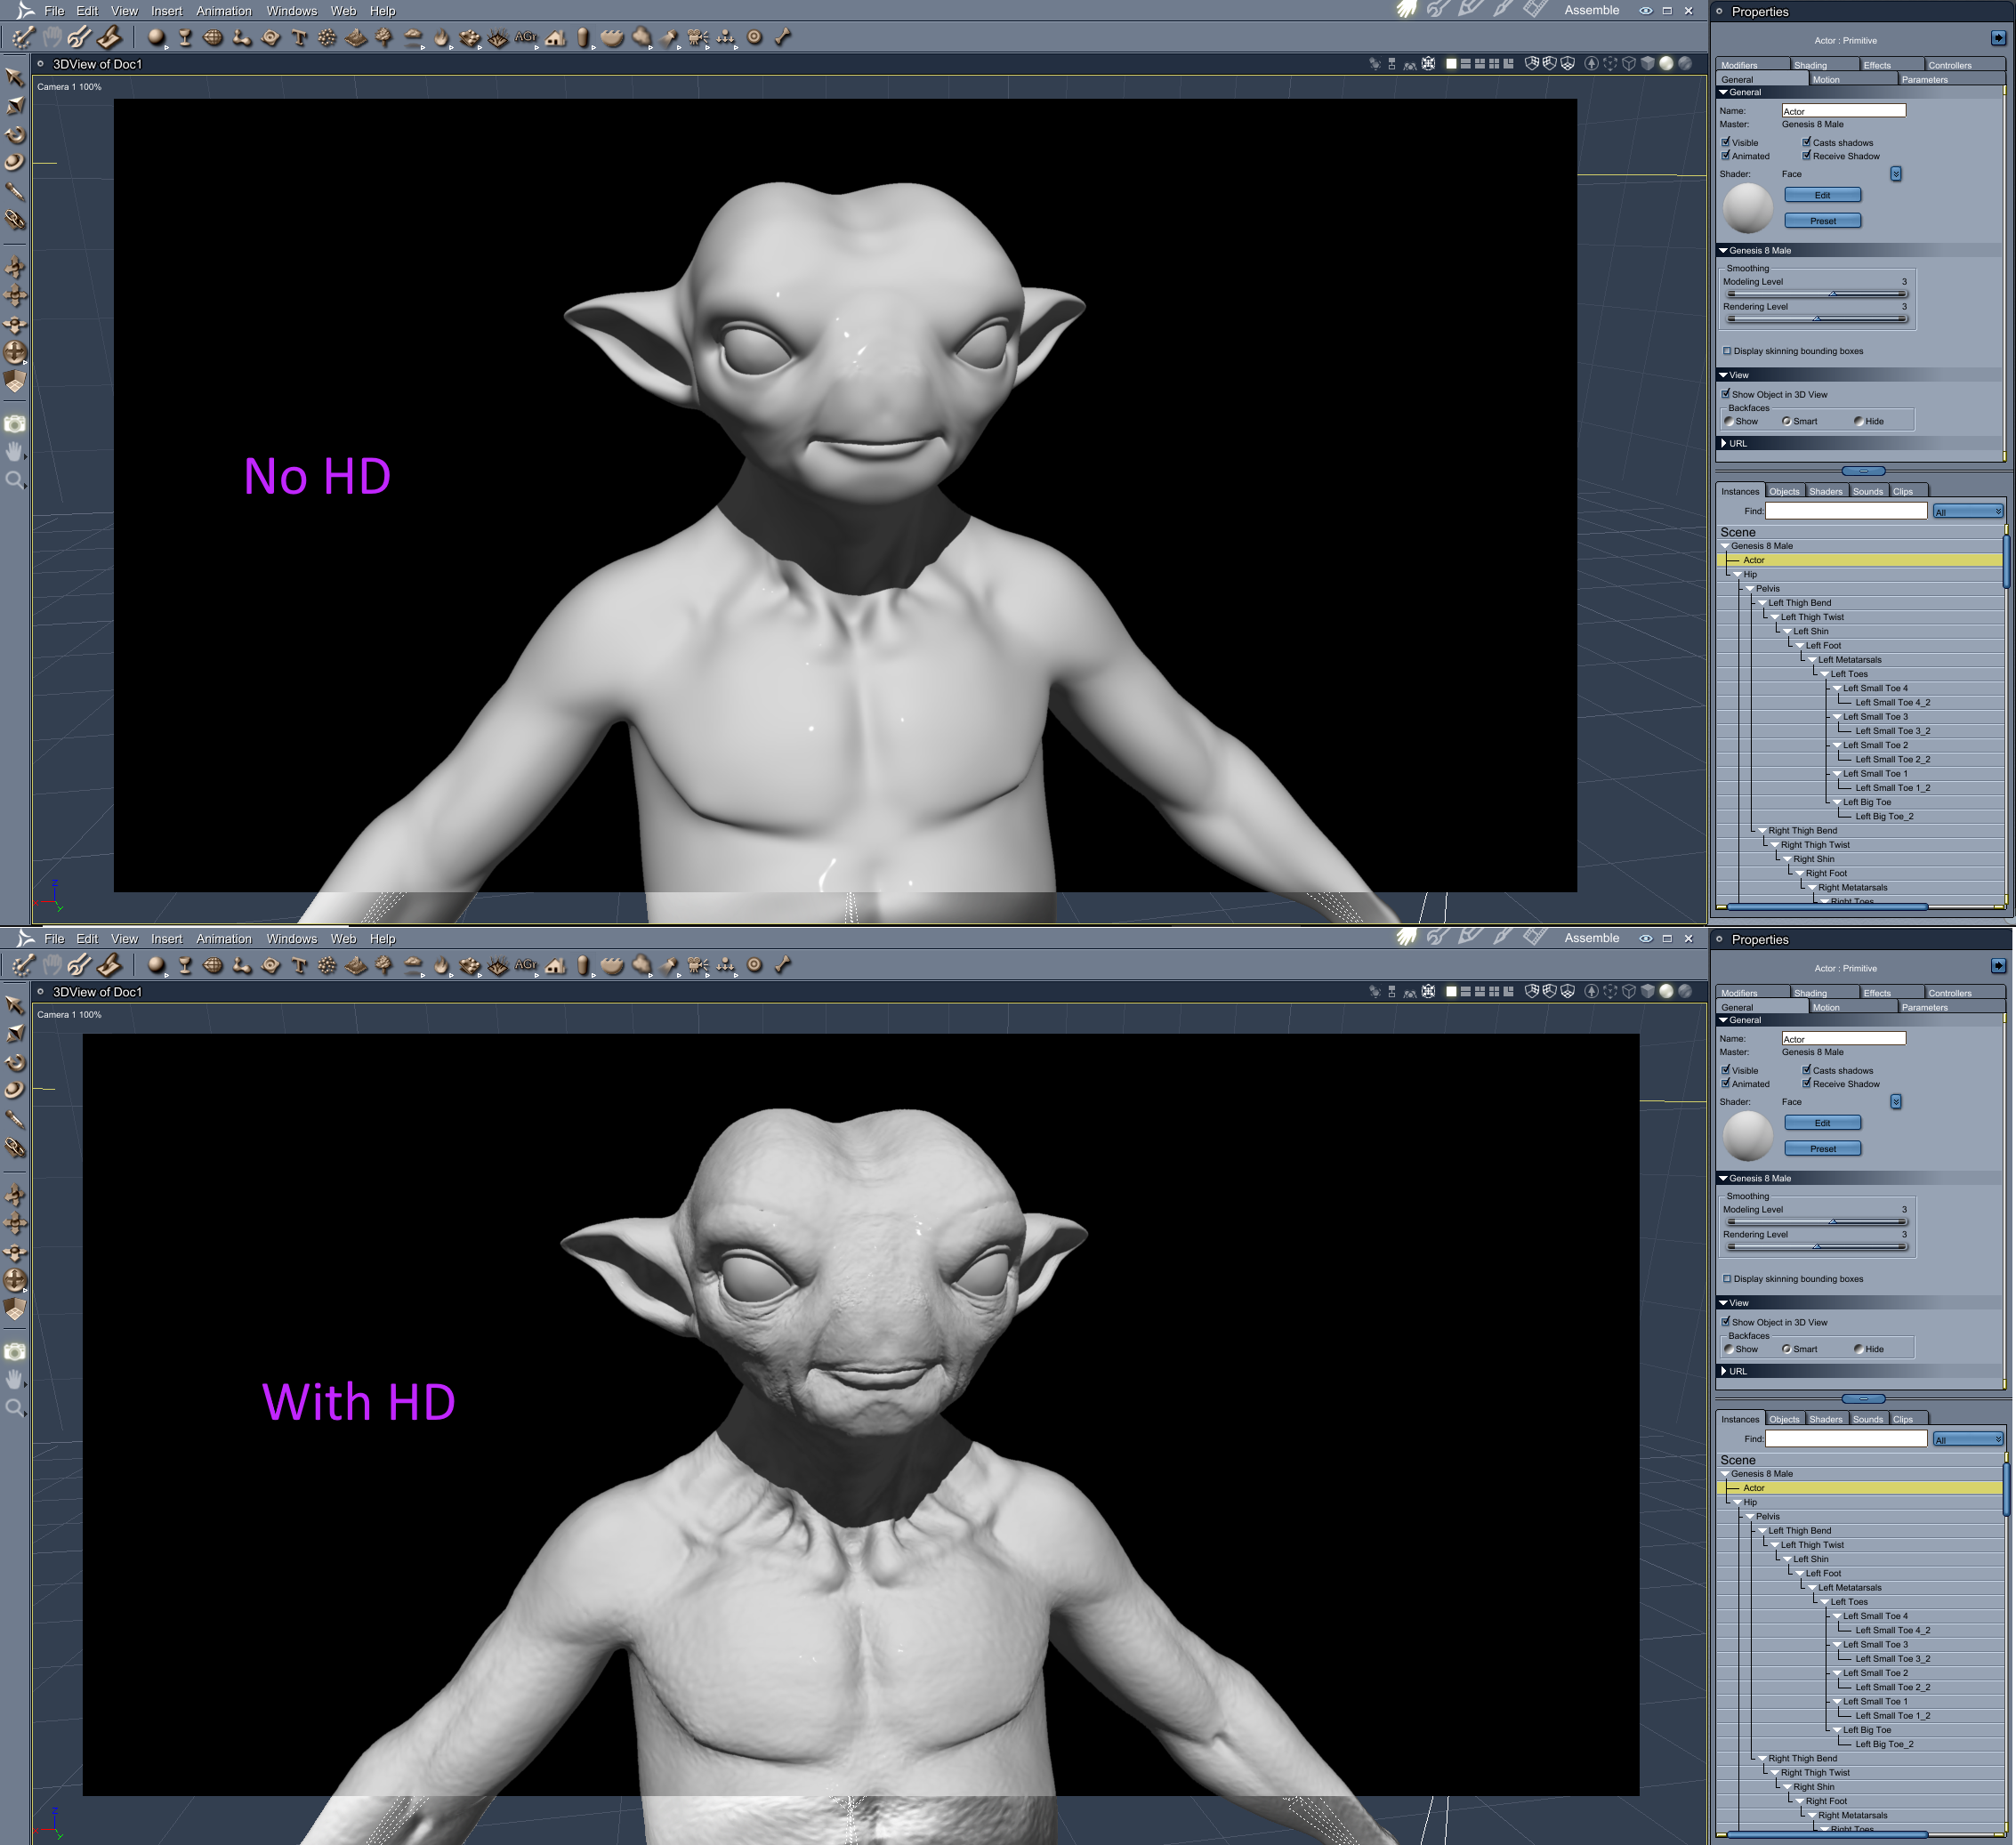
Philemo released another Carrara plugin at the end of April in 2019, the HD Morph plugin for Carrara, that supports high resolutions characters import into Carrara or even making your own HD content inside Carrara. Here is an early test render from Bunyip of Marvin the alien for G8M: https://www.daz3d.com/mervin-the-alien-hd-for-genesis-8-male
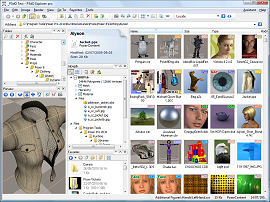
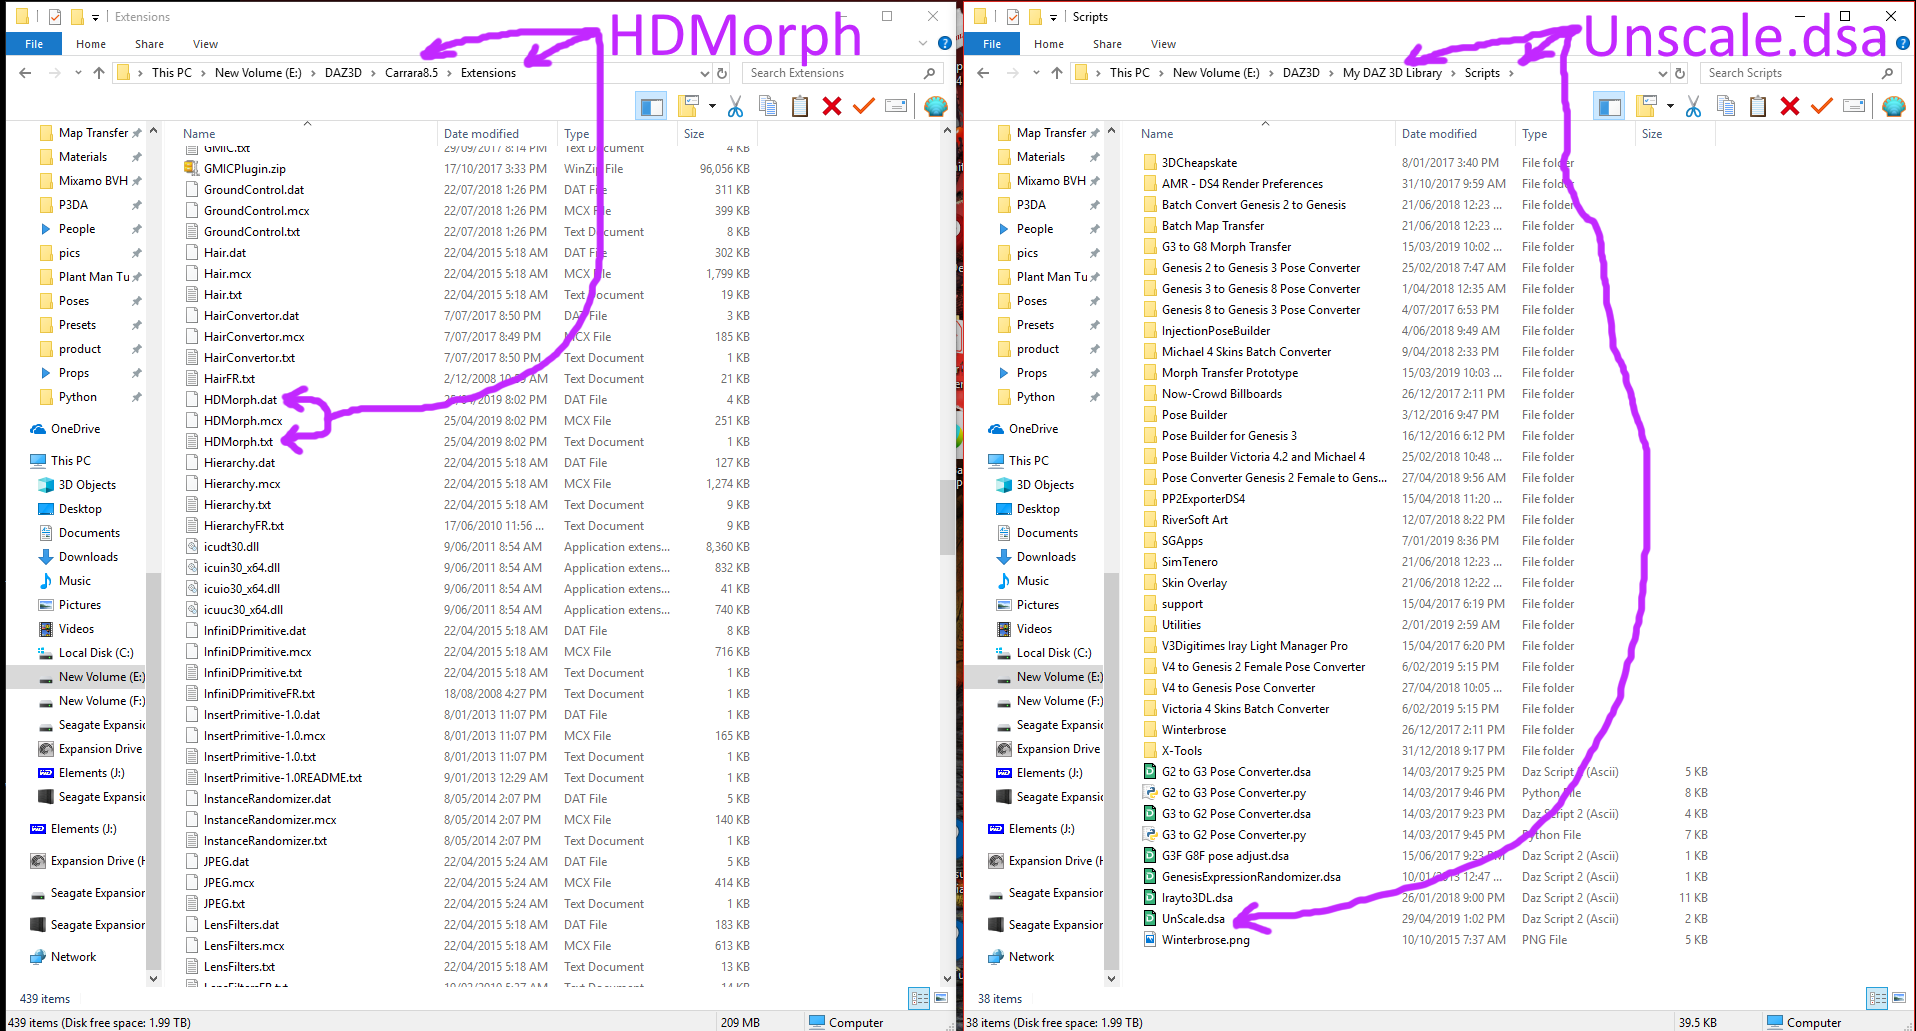
The Carrara files should be copied as usual to the Carrara Extensions folder, a bit new for Carrara users, is the Daz Studio scaling script that must be copied to the Daz Studio folder, to solve issues with some characters, here is a screnenshot showing the folders:
Dartanbeck more detailed step by step guide clearifies some of the steps, using the Gianni 6 HD character as an example:
“And just to clarify, in Step 4 and Step 5 of the tutorial, he is first (step 4) importing the exported (from DS) HD morphed figure as an OBJ with his import notes applied, and then in step 5, he’s loading in the figure that we would otherwise use the morph on into the same scene, with the obj from step 4.” An example: If we’re going to use a Gianni 6 HD morph,
Step 1 – in Daz Studio we’d load in Gianni 6 HD character preset
Step 2 – since this is a Character Preset, this step should already be done (but check his notes just to see what it means)
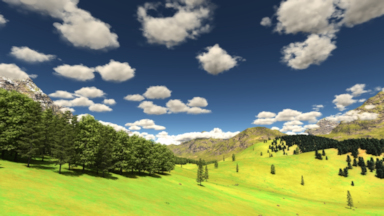
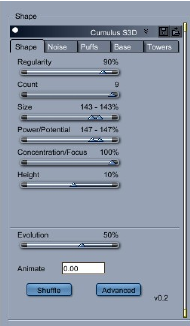
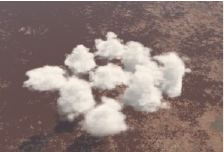
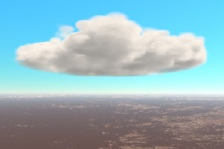
Sparrowhawke3D introduced a new plug-in called Cumulus S3D
Cumulus S3D is a volumetric cloud shape plugin that creates up to 9 puffy animatable clouds in rows. The clouds grow and fade over time and puffs circulate within the clouds.
With many settings and options the clouds can be arranged in neat rows or be randomly spread. Towers can rise and fall above the base of the cloud which can be flat, rounded or undulating.
Carrara has 2 kinds of lighting, direct and indirect.
Direct lighting comprise all kind of lights (directional, sun, bulb, spot, anything glows, shape lights…).
Indirect lighting are ambient, sky light and indirect light.
The main difference between direct and indirect is that all the features of the lighting model (highlight, shadows, SSS, translucency) are used only with direct lighting. Indirect lighting considers all materials as mate, with no SSS, shadowless. If your materials follow this description, then no problem. Otherwise, renders using indirect lights often seem dull and whitish.
The goal is to add a true environment lighting in Carrara, as seen in all modern renderers.
To come back to this plugin, the idea is to create a dome of direct lights (here directional lights) with value extracted from an HDRI map. This is supposed to give the best of both world.
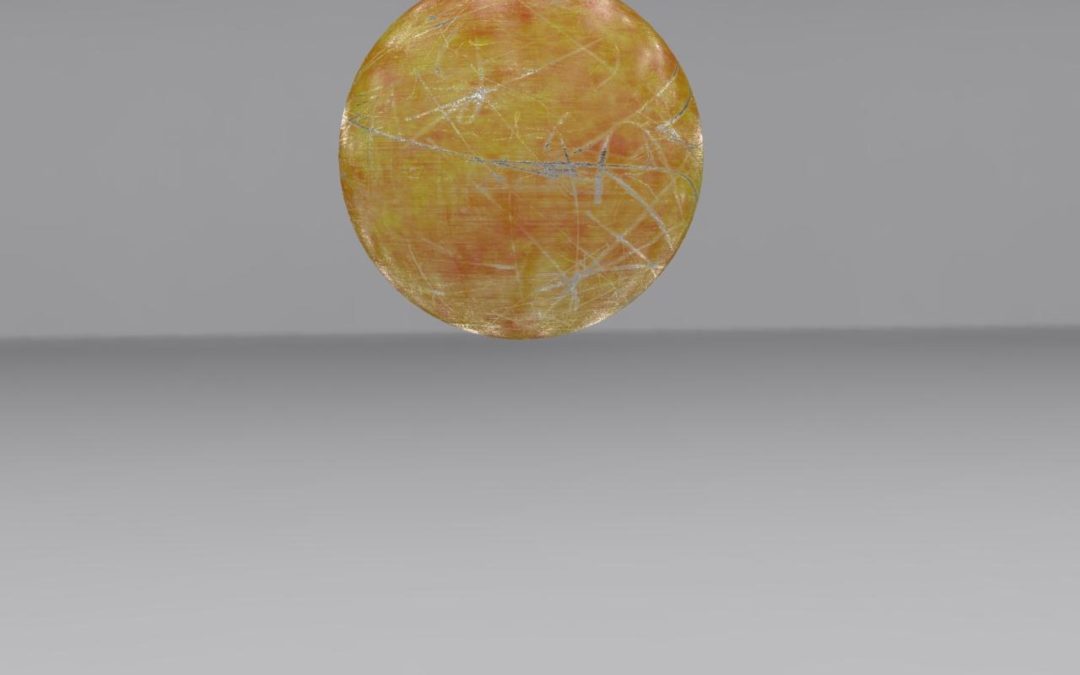
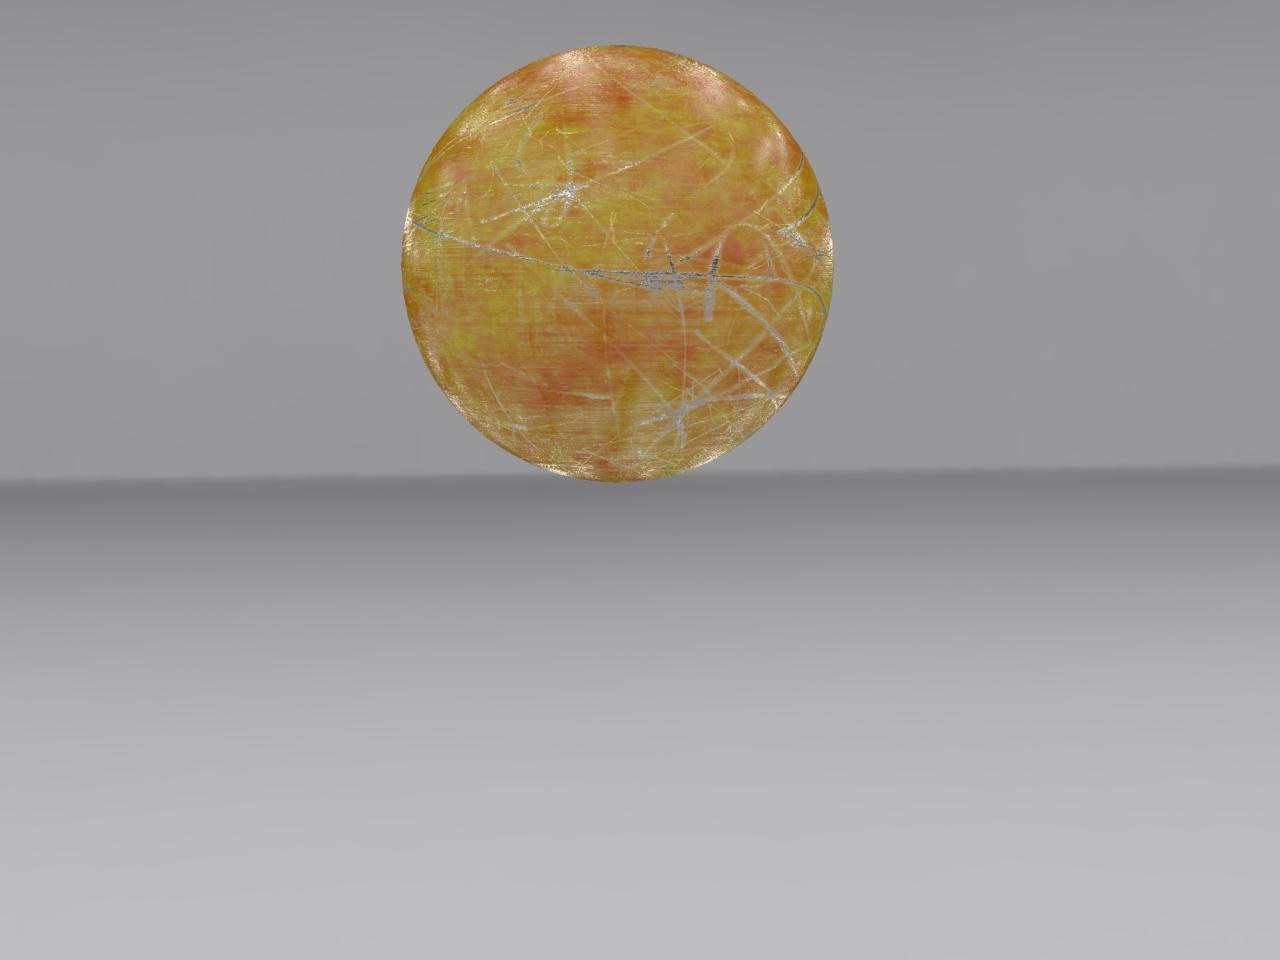
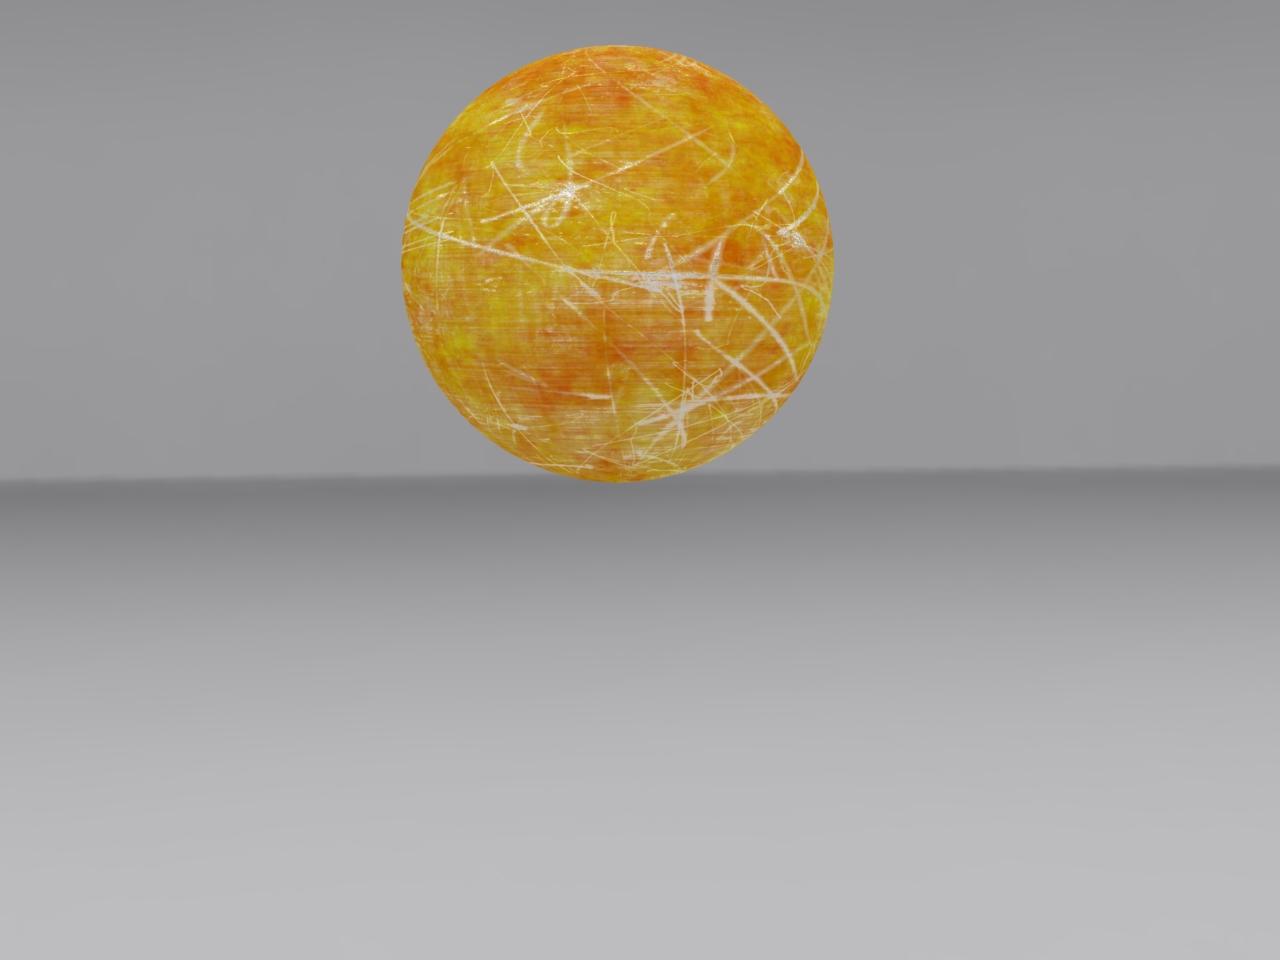
A side by side comparison of rendering a shiny object using sky light and dome light
Sky light
Dome light
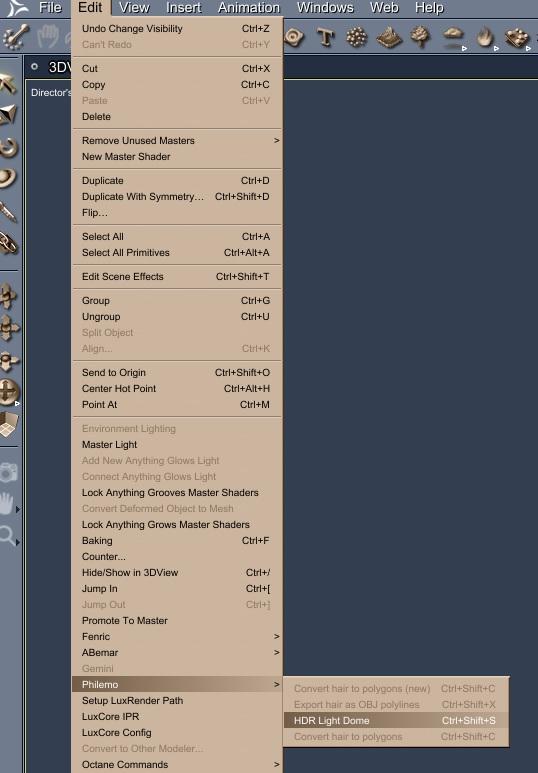
How to use it
First, there must be an HDR Background set for the scene
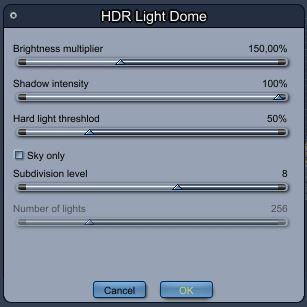
The command to create is in menu EDIT/Philemo/HDR Light Dome.
It open a window with 5 parameters:
Brightness multiplier. It’s similar to the sky light intensity slider in the render room. It’s related to the shadow you’ll use (hard light threshold slider a bit below). The more shadow, the more brightness you need
Shadow intensity. Same as in lights.
Hard light threshold. It’s the threshold below which a light will be considered a hard light (ie cast shadow). A 5% value leave only the sun as hard light in a bright sky. A 200% value has all the lights as hard light.
Sky only : Will generate a half dome and no light from the ground.
Subdivision level : drives the number of lights generated by a power of 2. 5 is 32 lights, 6 is 64, 7 is 128, 8 is 256…
Optimal is often found with 256 lights, 200% threshold. It may be a bit long to render, more if you have transmaps, so you can lower some setting. That’s why the default is 50% threshold
Of course, when rendering, sky light option should be unselected.