Carrara/Marvelous Designer Walkthrough by booksbydavid
A Carrara/Marvelous Designer Walk through
by David Collins/booksbydavid
Marvelous Designer is a clothing design program that allows you to create and drape simple as well as very complex dynamic clothing. It translates 2D patterns into 3D cloth ready to fit any imported avatar. It takes a bit of time to learn how Marvelous Designer does things, but after you’ve passed that hurdle dynamic clothing creation is simple.
While Carrara doesn’t have built in dynamic cloth functions, dynamic clothing can be used to good effect in Carrara via Marvelous Designer. This short walk through is how I get dynamic clothing from Marvelous Designer to Carrara.
For this walk through, I’m using Carrara 8.1 Pro and Marvelous Designer 2. There are newer versions of both programs, but the upgrade cost for both programs is out of my reach. As far as I can tell, however, this walk through should work for the newer versions of each program as well.
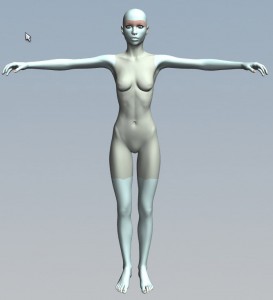
First, in Carrara load the figure you plan to dress. I’m using Victoria 4 for this example. It is also a good idea to load whatever morphs you will need and morph the character now before you move it into Marvelous Designer. This saves time and aggravation later.
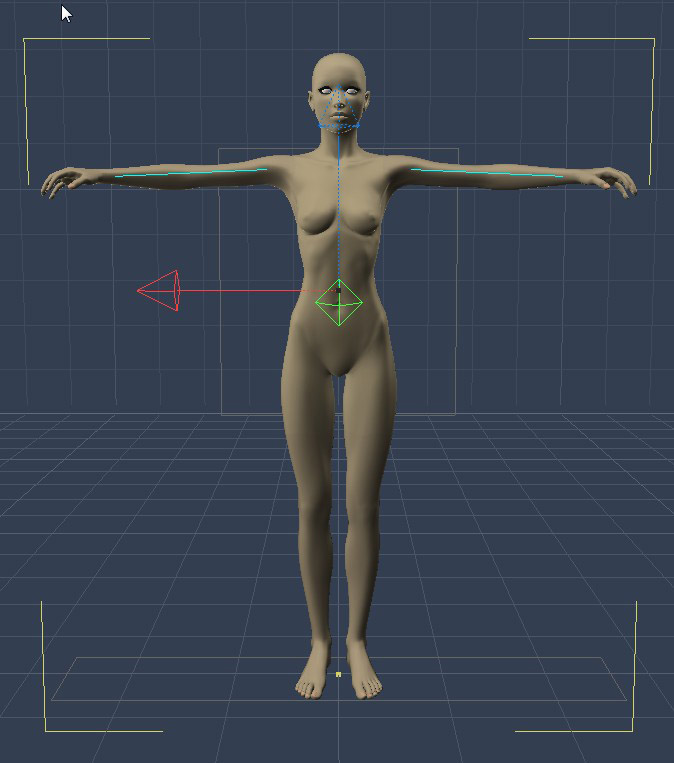
Once you’ve got the figure you want, you will need to export your figure as a .obj file. Marvelous Designer will import Collada as well, but I have not had good results going that route. To export the figure in Carrara, choose File/Export. A dialogue box will appear.
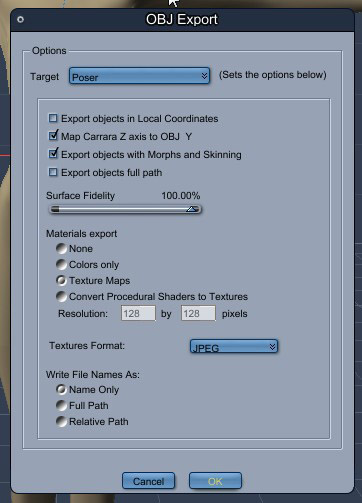
You will have several different Target choices. It doesn’t really matter which one you choose as Marvelous Designer will automatically scale the model when it’s imported. If you choose the default target make sure you check Export objects with Morphs and Skinning, so your figure will import with its morphs intact. To avoid confusion, I always choose the Poser target.
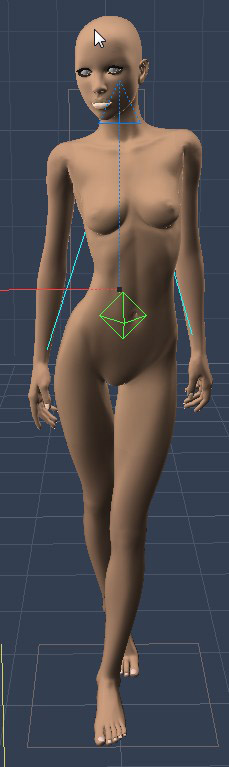
Next, pose your figure as you will want it in your final render and export this figure using the same process as above. Save your posed character in Carrara, so you can use it later.
After the figure is exported, you will then import the figure into Marvelous Designer. When Marvelous Designer opens, you will see the default avatar already loaded. You need to delete this avatar and her dress. To delete the avatar, chose Avatar/Clear. Then go to File/New to clear the scene.
![]()
Next, you will import your figure. Go to File/Import/Obj and locate your figure. A dialogue box will appear.
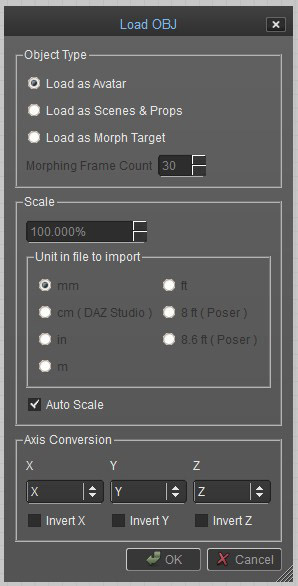
You will need to make sure ‘Load as Avatar’ is ticked and ‘Auto Scale’ is checked. Then hit ‘OK’. Your figure will load into Marvelous Designer properly scaled and with morphs intact.
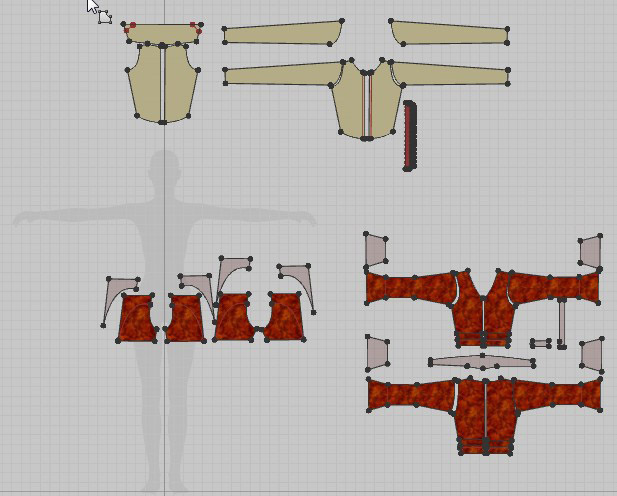
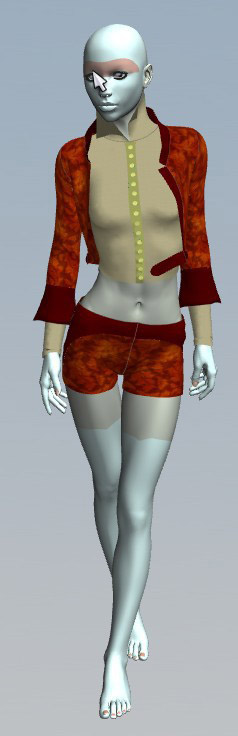
You can now proceed to create your clothing pattern. Here is an outfit I created for V4.
Once you have created your clothing, you will need to fit the clothing to the figure.
Now, we want to fit the clothing to our posed avatar. Choose File/Import/Obj again. This time select the .obj of the posed figure you created at the beginning. A dialogue box will appear.
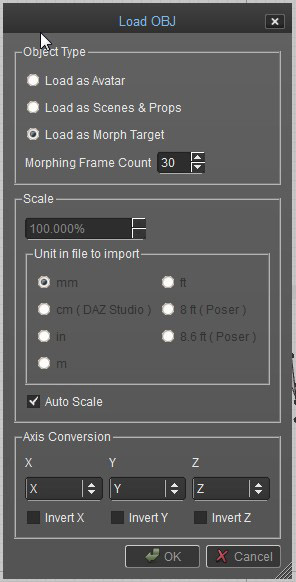
This time you will tick ‘Load as Morph Target’ and check ‘Auto Scale’. Marvelous Designer will run a simulation using the posed .obj as its target. When the simulation is complete, the clothing will be fitted on the posed model.
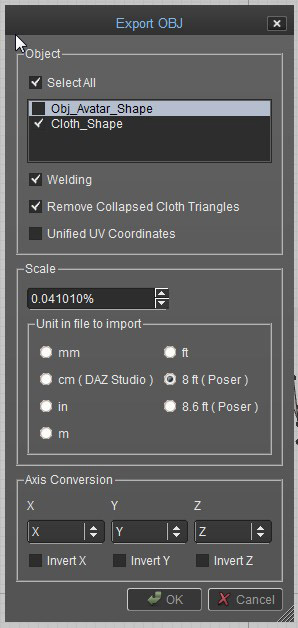
After the clothing is fitted to the figure, you can export it to Carrara. In Marvelous Designer choose File/Export/Obj. A dialogue box will appear giving you the export options. You will need to check boxes for Cloth_Shape, Welding and Remove Collapsed Triangles. Unless you want a .obj copy of your original figure, make sure that the box for Obj_Avatar_Shape is unchecked.
I do not check Unified UV Coordinates. I normally add textures in Marvelous Designer. I scale and adjust the textures using Marvelous Designers texture tools. Unifying the UVs will erase all of that on export and make all the textures the same scale. I’ve not noticed any real benefit to unifying the UVs since I’m able to work with textures in Carrara either way, so it all depends on where and how you add textures to your garment.
The last to do is make sure that ‘8ft. Poser’ scale is ticked. This will make sure that the clothing object will be exported in the correct scale.
The next step is importing the new clothing object into Carrara. In Carrara choose File/Import. You will get a dialogue box.

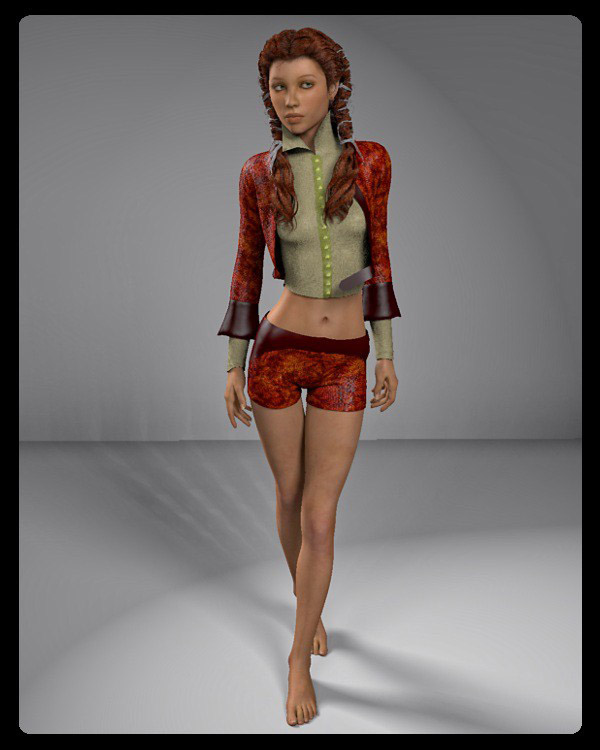
This time make sure you choose ‘Poser’ as your source. Any other option will load the clothing object in the wrong scale. Click ‘OK’. Your garment should load in the correct scale in the pose you exported it with.
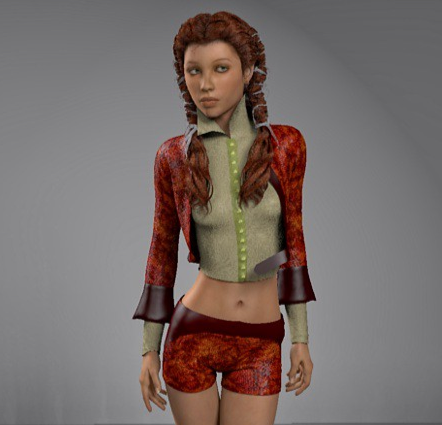
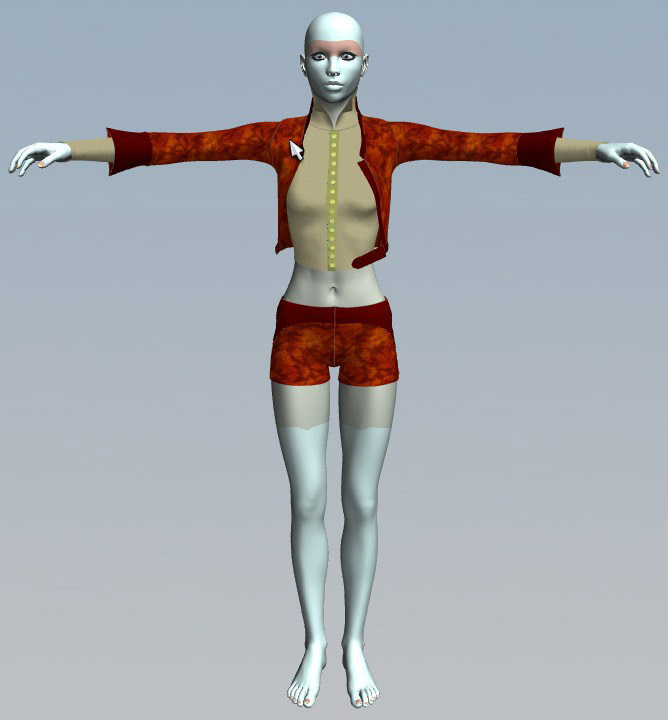
Here is the final image of my Carrara/Marvelous Designer creation. It’s missing some details that can be added in Carrara or Marvelous Designer or in post but in general it looks pretty good.
©2014 David Collins/booksbydavid
Download Carrara/Marvelous Designer Walkthrough as PDF
Additional Links
Marvelous Designer
http://www.marvelousdesigner.com
MDD File Format for Carrara import/export plugin needed for MD’s animation add-on
http://www.daz3d.com/mdd-file-format-for-carrara
Fenric’s OBJ Sequence Exporter plugin alternative to MDD file format
http://fenric.com/wordpress/store/products/object-sequence-exporter/
DCG Importer Digital Carver’s Guild OBJ Sequence import plugin alternative to MDD file format
http://www.digitalcarversguild.com/plugin.php?ProductId=21


